Create a Data Science Ubuntu Virtual Machine
This guide will go over how to create a VM with Ubuntu that has many preinstalled packages useful for data science and machine/deep learning on Azure.
Differences between this VM and the Ubuntu 18.04 VM
This machine will come with many preinstalled packages that are useful for data science, e.g., Anaconda Python, Jupyter, Tensorflow and PyTorch, R support, and Spark. If you are not planning on doing much data science on this VM or only need a few extra packages installed, please read the Create-VM-Linux guide to create your VM.
Video Guide
Login into Azure
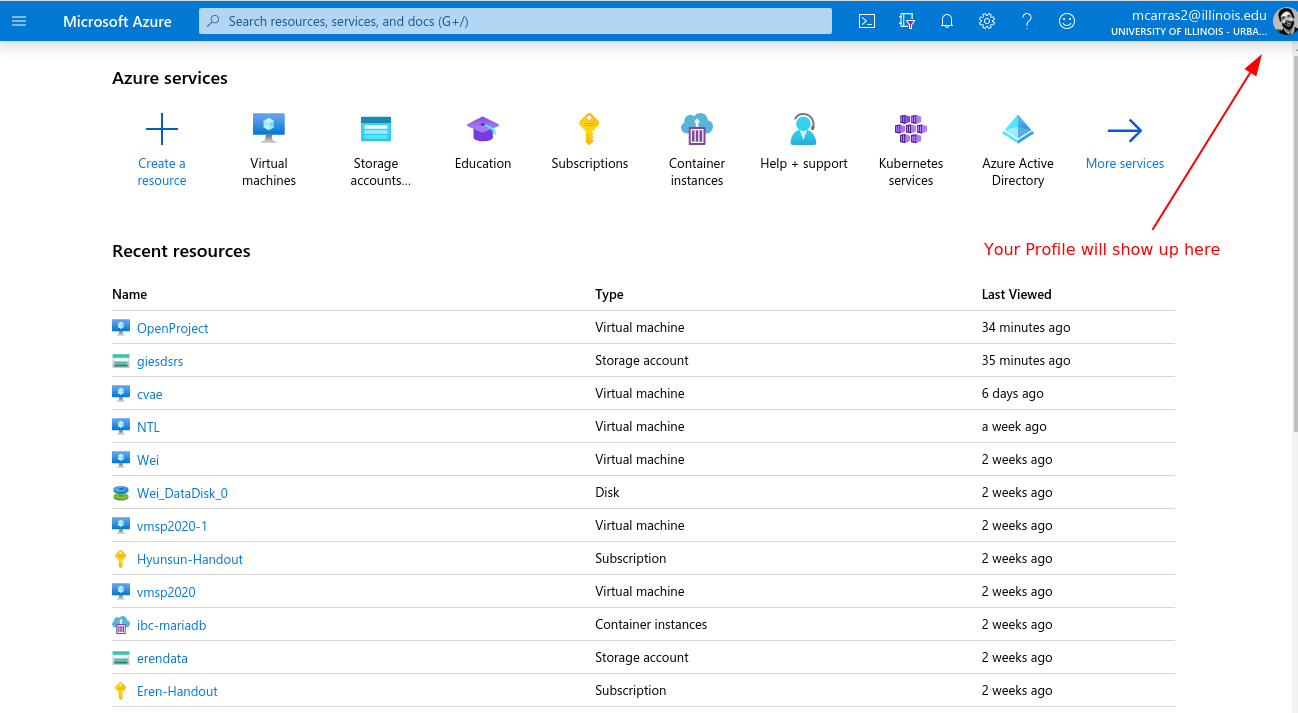
Go to https://portal.azure.com/ and using your UIUC credentials log into the portal.
You should see something like this:
Create VM
After you have logged in, click the Virtual Machines button or type it in the search bar.
Once you are in the Virtual Machines page, click the Add button highlighted in the picture below:

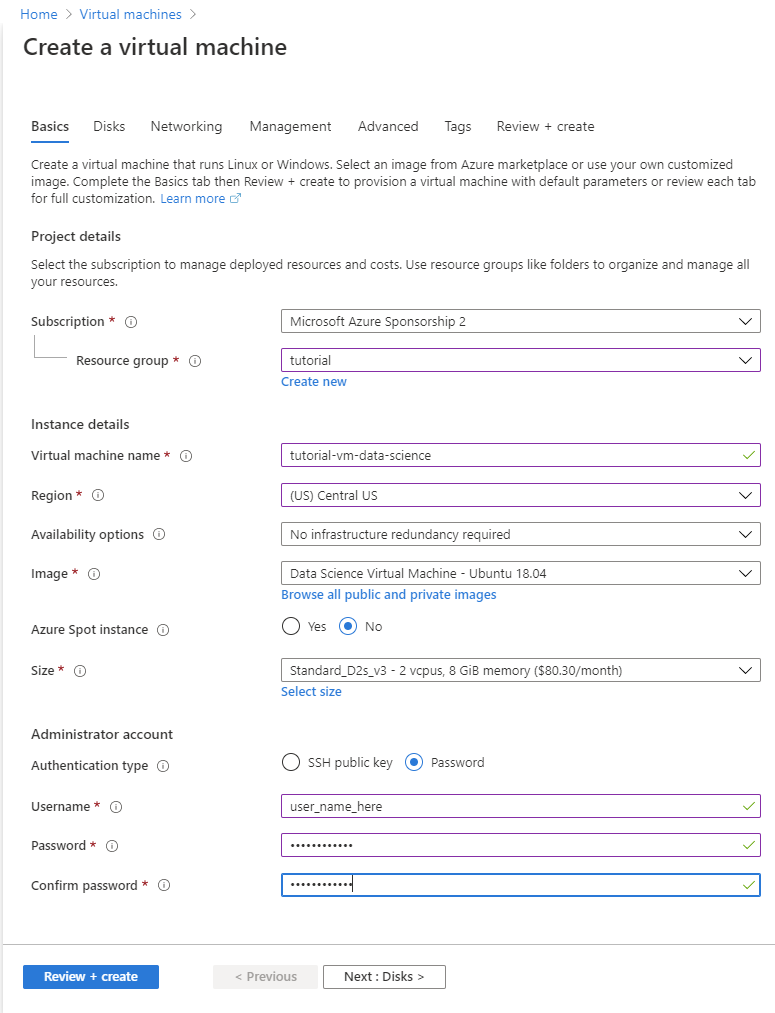
Basics
- Make sure your Subscription is the right one.
- If you don’t have a Resource group just create a new one
- Give the VM a name, e.g. tutorial-vm-data-science
- Select your Region (make sure is within the US).
- Leave the No infrastructure redundancy required
- Image
- Click the Browse all public and private images button
- Then in the search bar that pops in type in Data Science Virtual Machine - Ubuntu 18.04
- Click the one entitled Data Science Virtual Machine - Ubuntu 18.04 - Gen1
- No Azure Spot Instance
- Size
- Here you can Change size and select a larger machine with more cores and/or memory, including GPU in certain cases
- Authentication
- You can use a SSH key pair or a password, I choose password for simplicity here
- You want the SSH port 22 selected so you can access via ssh
Disks
The default disk will have ~100G of free space when we are all said and done. If that is enough for you, then you can move on to the next part with only the defaults. If not, you can create a new disk, which we will go over here.
Below is what you should see:
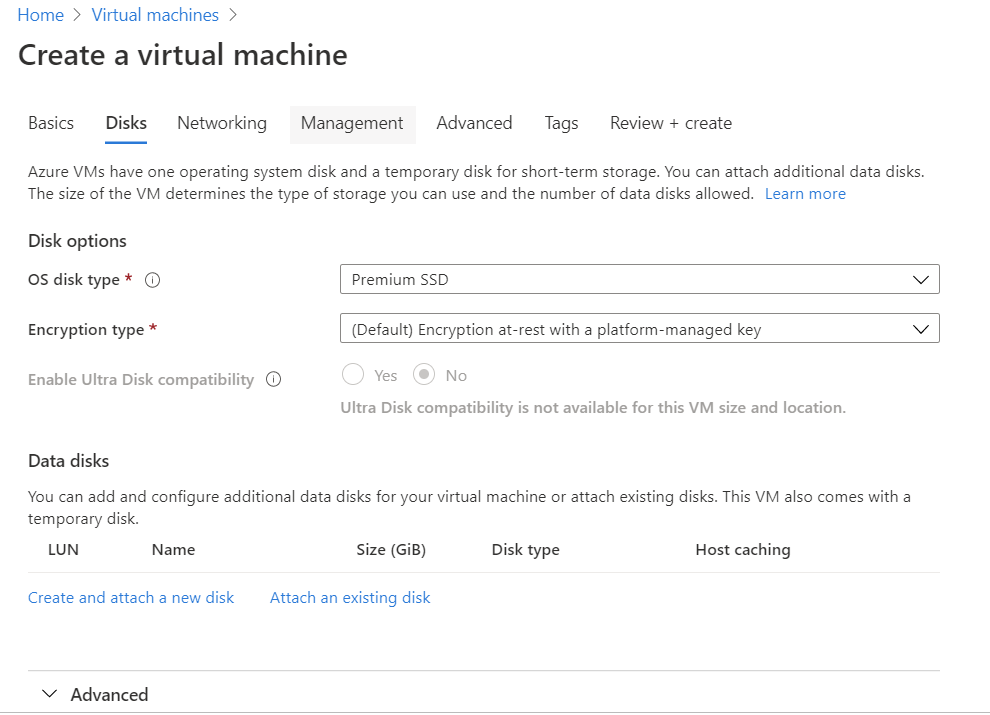
Click the Create and attach a new disk button. You should now see something similiar to below:
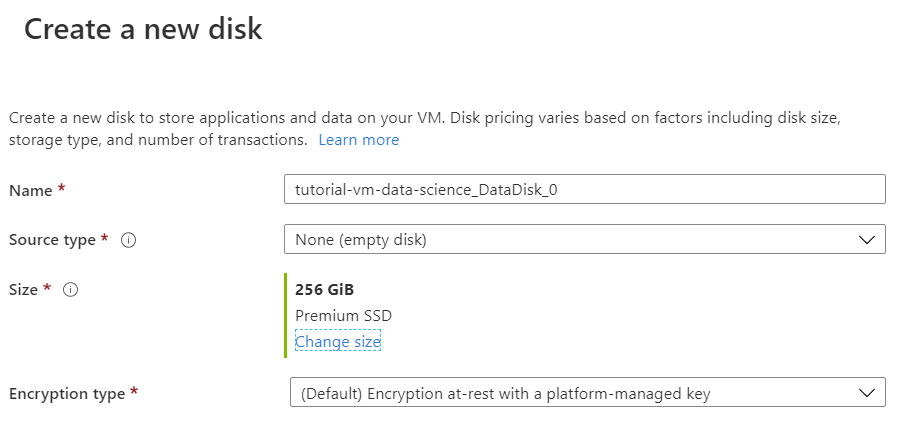
From here you can change the size of the new disk by clicking on the change size button. In our case we changed it to 256GiB. The defaults for the other parameters are OK and do not need to be touched.
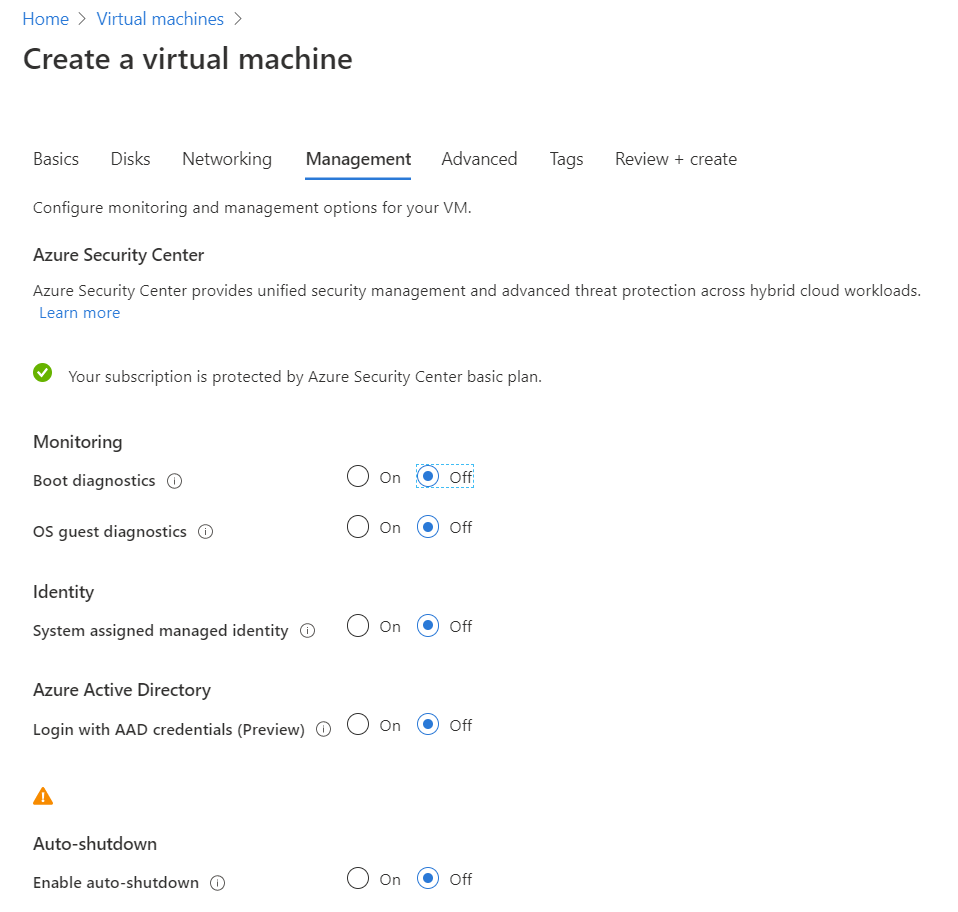
Management
I usually turn Boot diagnostics off. Other than that the defaults work well.
Advanced
Usually there is no need to use any of these, unless for example you want to run some scripts when the machine is created to install some packages, for that you would use cloud_init.
Tags
Optional. Used so you can easily spot your resource among others, to separate the entries in billing, etc.
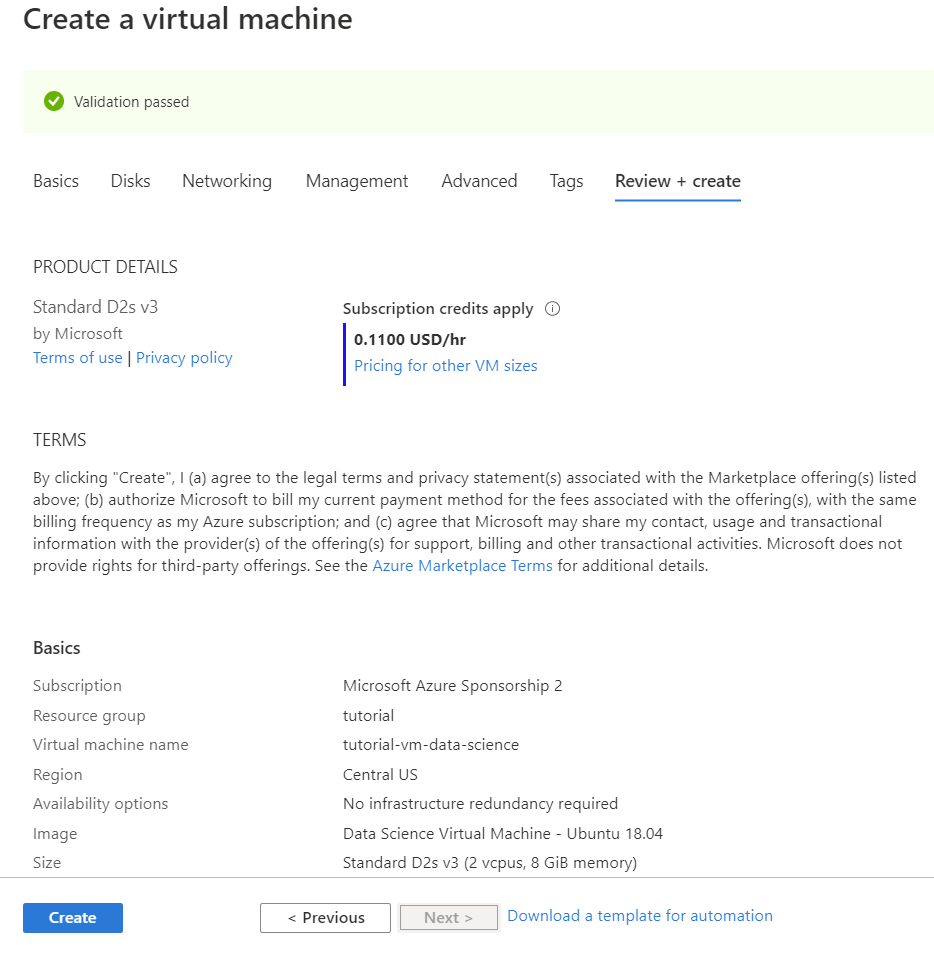
Review + Create
This page gives you a chance to review the options you selected in the last few pages. It also gives you a budget quote of the VM. At the top there should be a green check mark saying Validation Passed, if not, then restart this guide. If validation passed and you are pleased with the options you selected, then you can create your VM.
After clicking Create, it will take a few minutes for the machine to fully deploy.
Logging In To The VM
After the machine is deployed, go to its resource page. If you are still on the deployment page you can get there by clicking the Go To Resource button. If not, you can also search for your machine under the Virtual Machines section on your Portal Home (See First Figure).
After you get to the resource page, you should see something like the picture below:
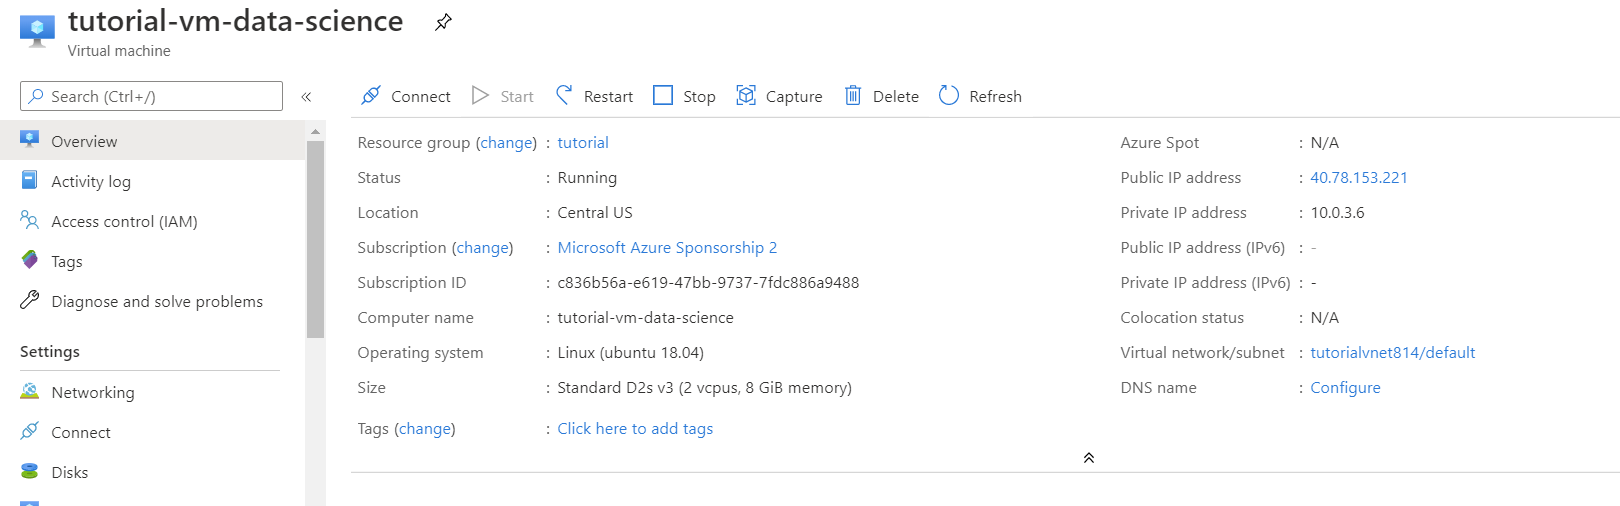
Copy your Public IP address (near the top right) to your clipboard. You will need it to ssh into the VM.
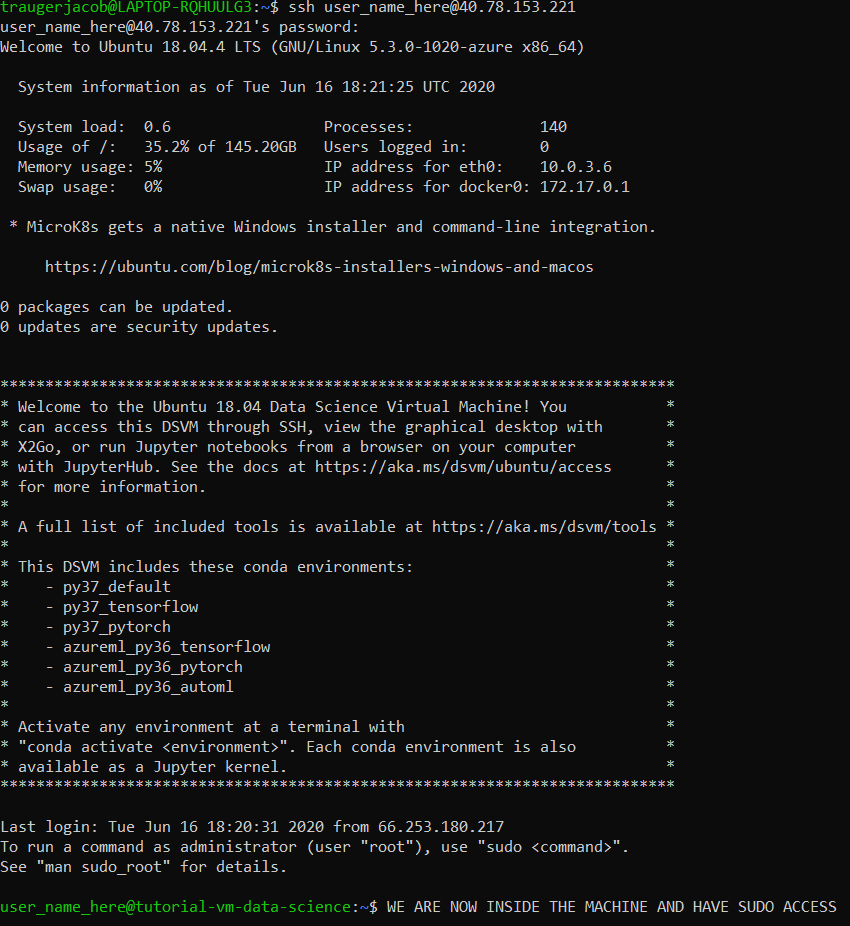
Now open up a Terminal and use the ssh command to log in. The command will look like ssh your_username@Public_IP_address. In this tutorials’ case, the username was set to be user_name_here and the IP address was 40.78.153.221. Thus below was how I logged into the VM:
The rest of this guide goes over how to mount the new disk we added from the Disks tab. If you did not create a new disk, then you are done with this guide.
Mount Created Disk
In the Terminal, enter the commend df -h and you should see something like:
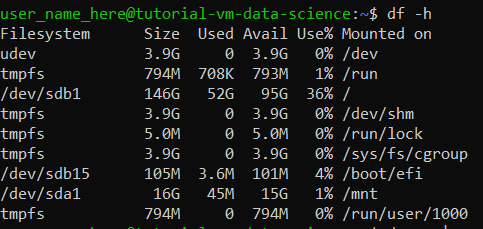
As you can see from the picture, we have sda and sdb mounted, however our created disk is not mounted.
To find our created disk, enter the command dmesg | grep SCSI.

We can see that our machine has 3 disks, sda, sdb, and sdc, since sda and sdb are mounted, we know our created disk is sdc
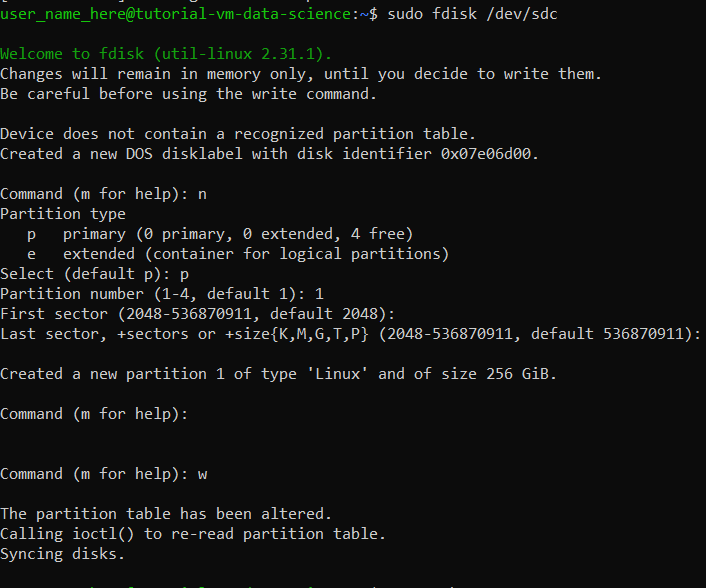
Now for to format and partition the created disk, run the command
sudo fdisk /dev/sdc
You’ll get prompt, type in n to create a partition, p to make it primary 1 for the partition number and default the rest. w to create partition and exit
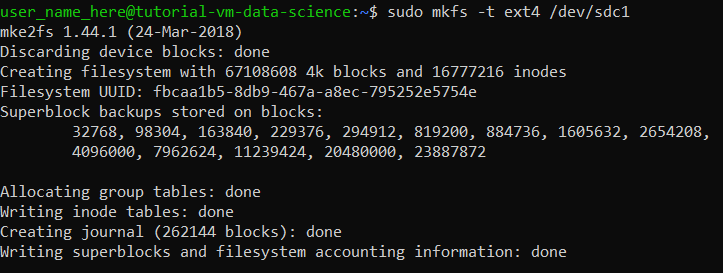
Now run the following commands to update the kernel and create a file system
    partprobe
    sudo mkfs -t ext4 /dev/sdc1
Your disk is ready to be mounted. Create a folder:
sudo mkdir /external
then mount the disk to it:
sudo mount /dev/sdc1 /external
give the right permissions to write (use your username name):
sudo chown -R user_name_here:user_name_here /external
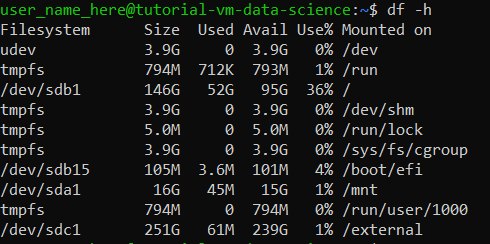
You are now ready. You have a SSD disk at /external to use. If you type df -h again:

If you restart your machine, you only need to repeat the last 2 steps,
mountandchown