Create a Windows 10 Virtual Machine
This is a guide on how to create a VM with Windows using Azure
Video Guide
Login to Azure
Go to https://portal.azure.com/ and using your UIUC credentials log into the portal.
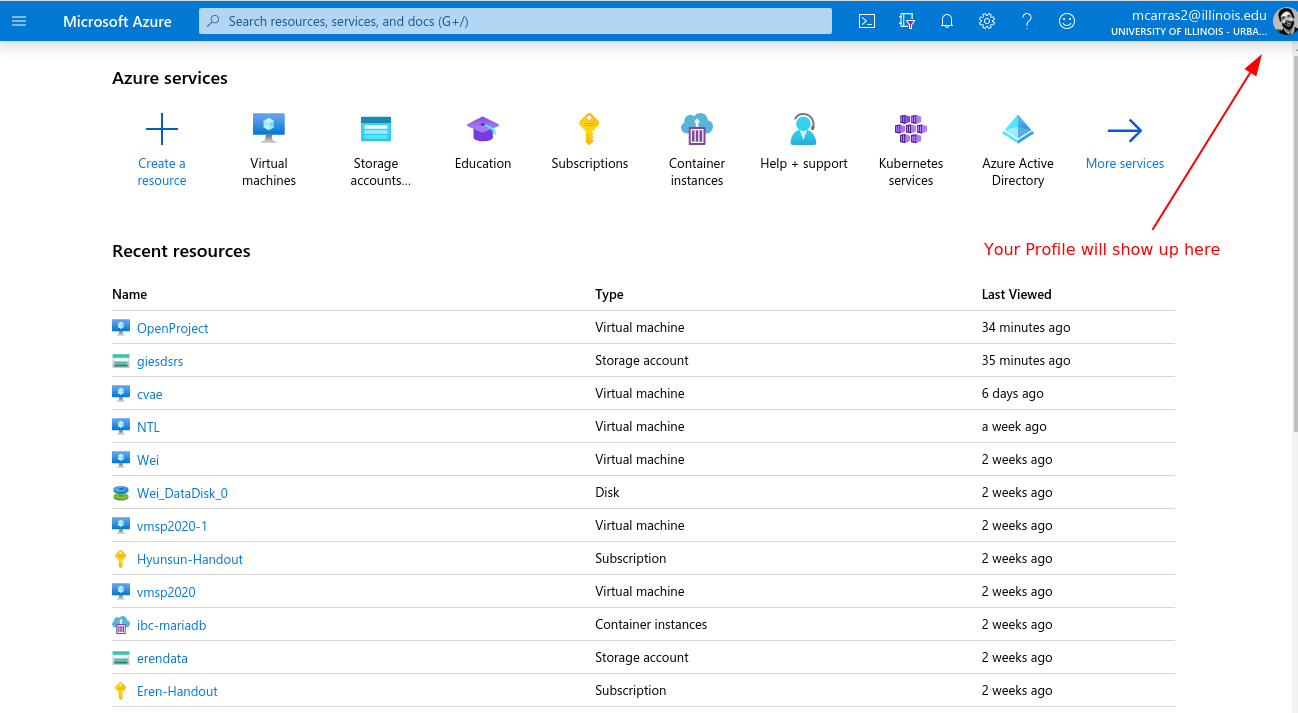
You should see something like this:
Create VM
After you have logged in, click the Virtual Machines button or type it in the search bar.
Once you are in the Virtual Machines page, click the Add button highlighted in the picture below:

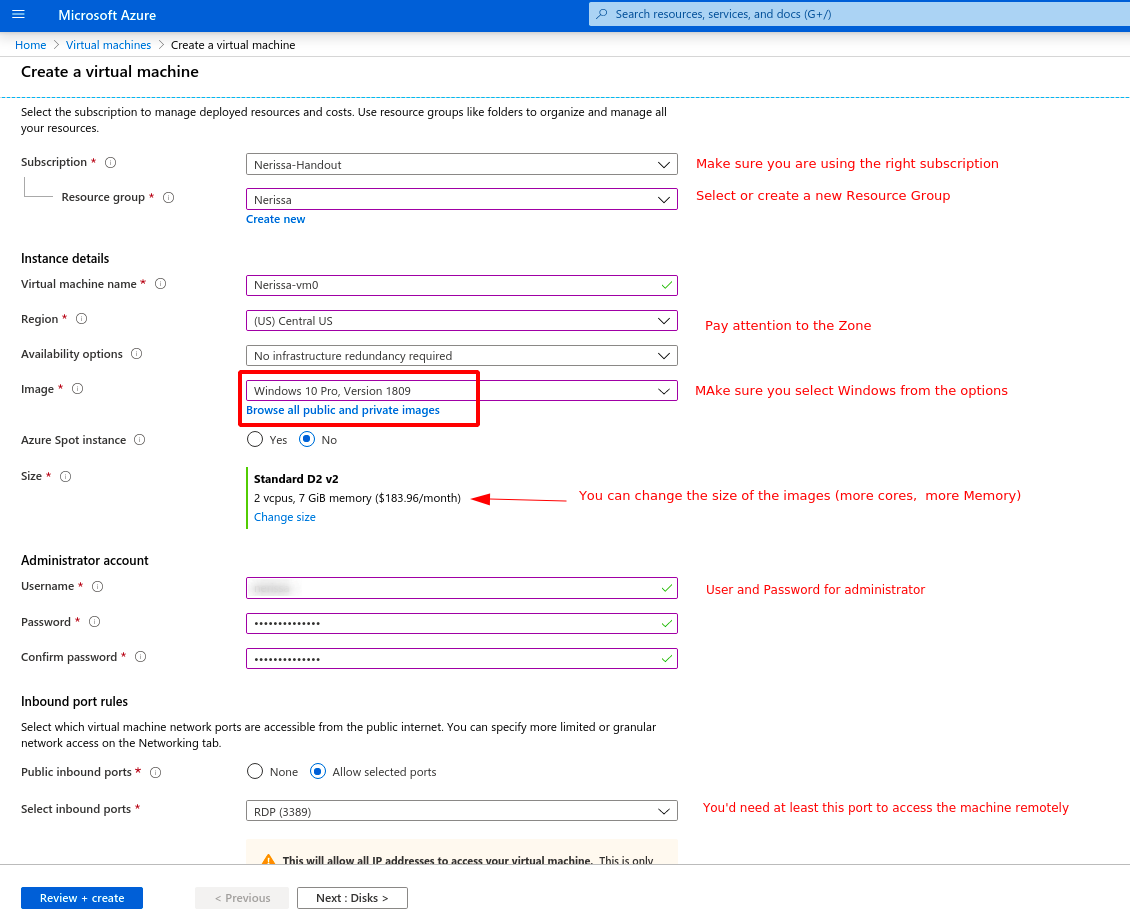
Basics
- Make sure your Subscription is the right one.
- If you don’t have a Resource group just create a new one
- Given the VM a name, in this case we named the VM Nerissa-vm0
- Select your Region
- Leave the No infrastructure redundancy required
- The image is the operating system the VM will have. Make sure you select the one with Windows 10.
- No Azure Spot Instance
- Size
- Here you can change the size and select a larger machine with more cores and/or memory, including GPU in certain cases
- Administrator Account
- Set the username you want for the admin account on the VM
- Set the password you want for the admin account on the VM
- The default selections for the rest of the fields will work unless there is a specific reason to change them.
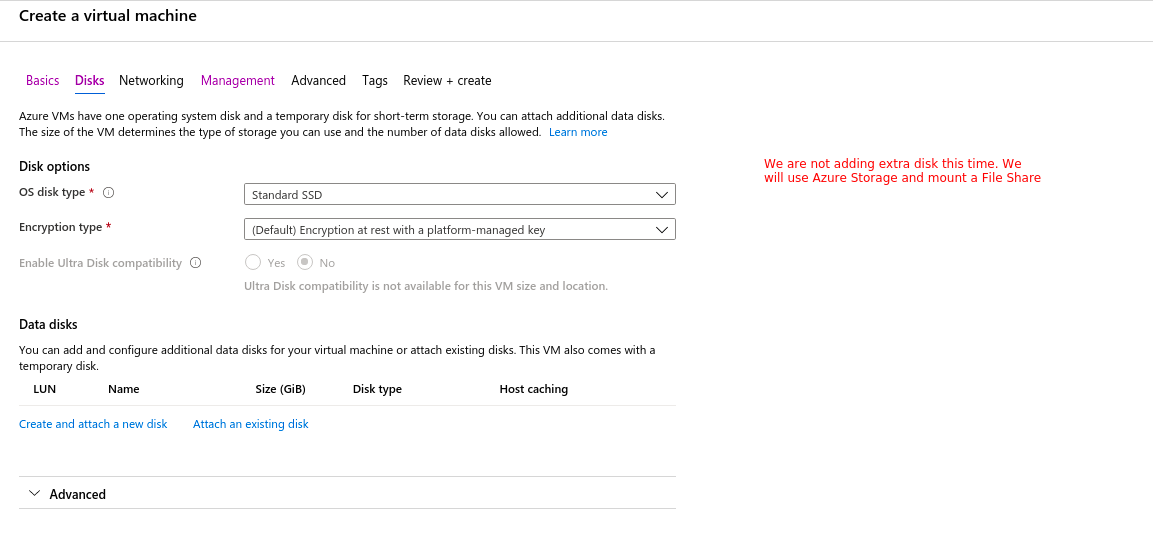
Disks
This page lets you change the OS disk type along with adding extra disks and other advanced options. In this tutorial we will not go over adding extra disks so we will leave these fields as the default.
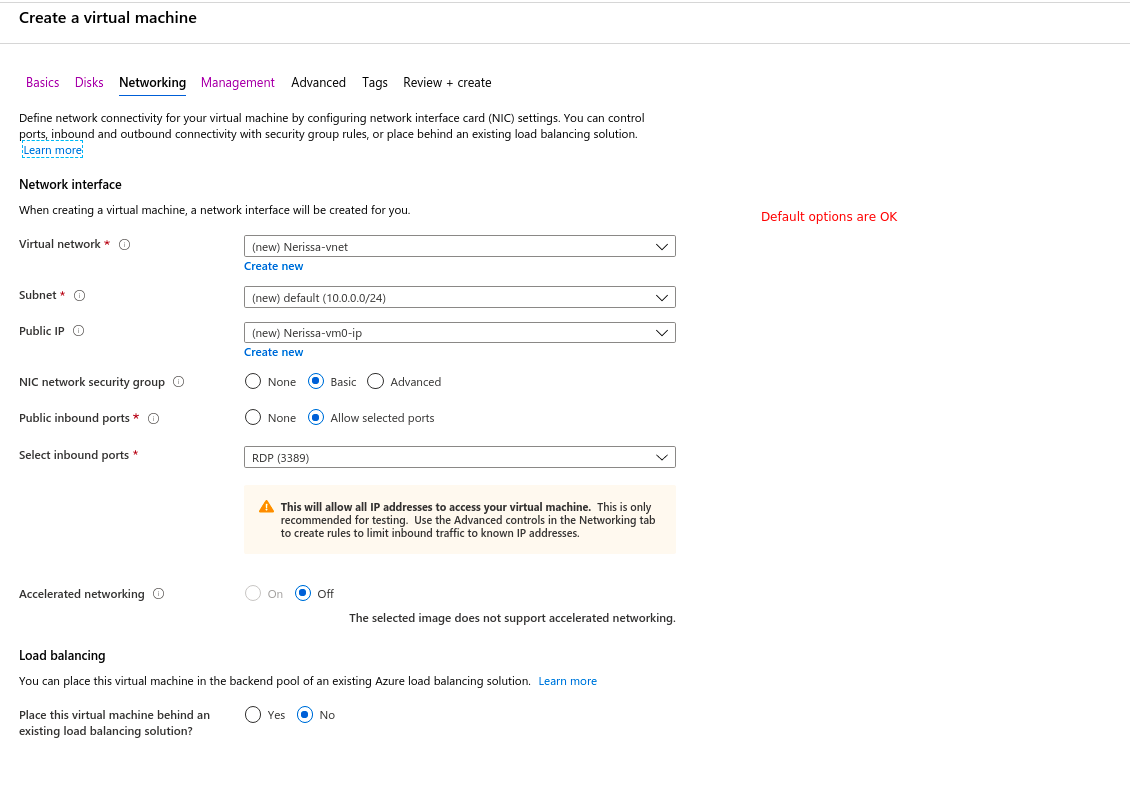
Networking
The default options work here.
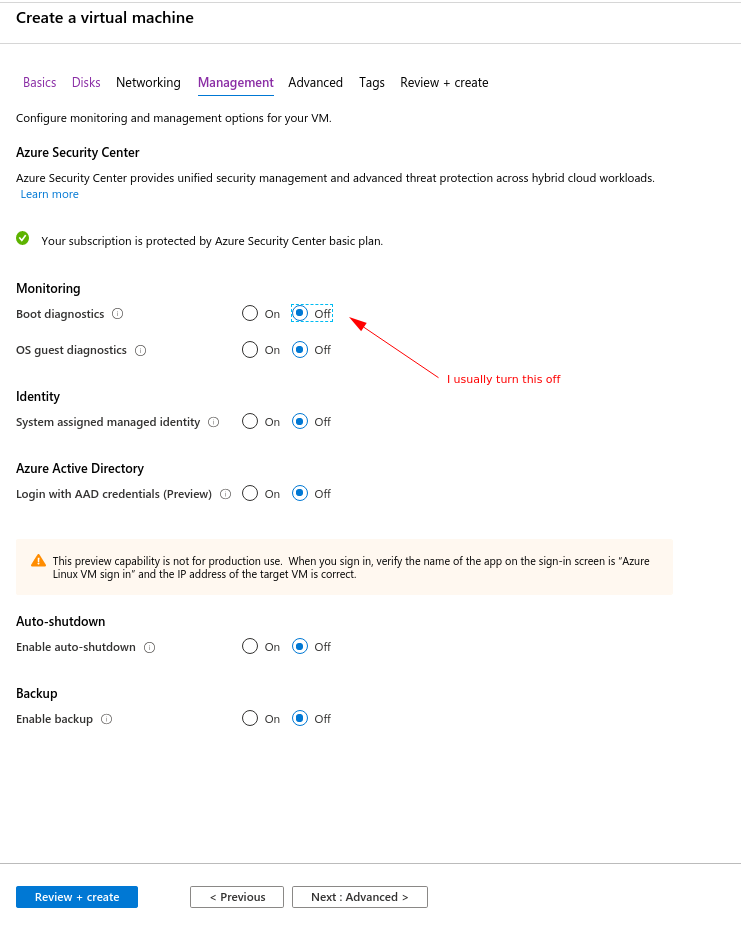
Management
Default values work here as well. You can change here if you want to enable back up, or auto-shutdown (in case you are monitoring the costs, etc).
You can also change the way to authenticate if different from username/password. Mostly to increase security
Advanced
Usually there is no need to use any of these, unless for example you want to run some scripts when the machine is created to install some packages, for that you would use cloud_init.
Tags
Optional. Used so you can easily spot your resource among others, to separate the entries in billing, etc.
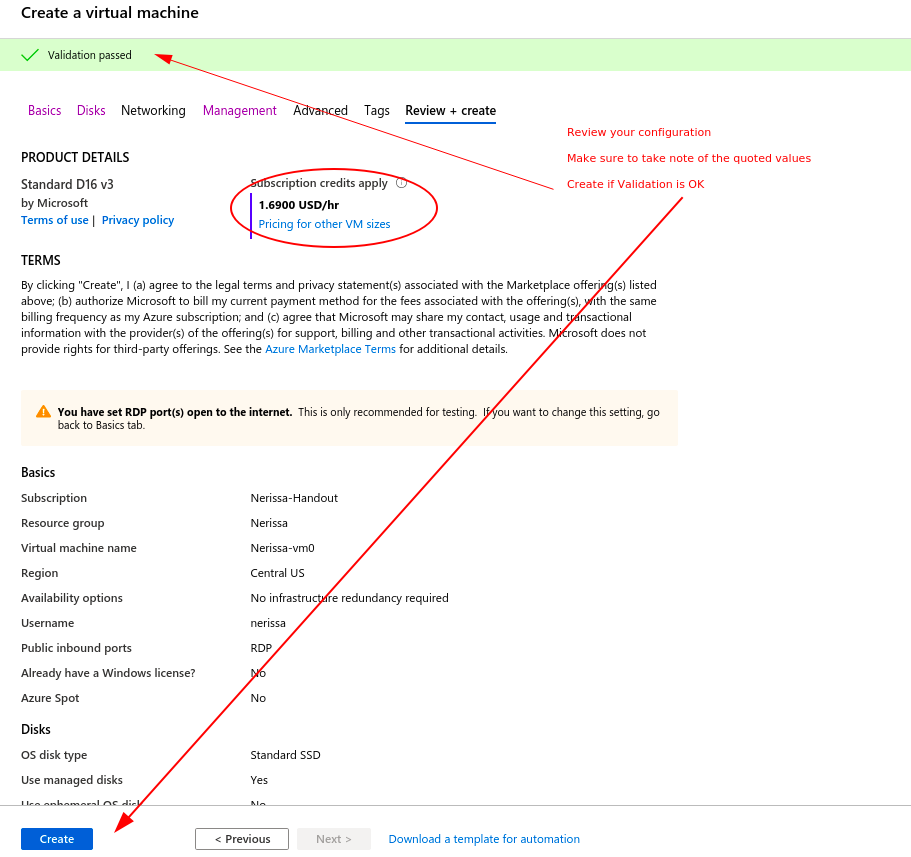
Review + Create
This page gives you a chance to review the options you selected in the last few pages. It also gives you a budget quote of the VM. At the top there should be a green check mark saying Validation Passed, if not, then restart this guide. If validation passed and you are pleased with the options you selected, then you can create your VM.
Note: The rest of this guide uses a different VM than the one we created above. Thus there might be discrepancies between the names we made above and the names below.
Access the VM
To access the VM using RDP (Remote Desktop Protocol), you will need to go to the VM’s resource page. From there you will see its public IP address.
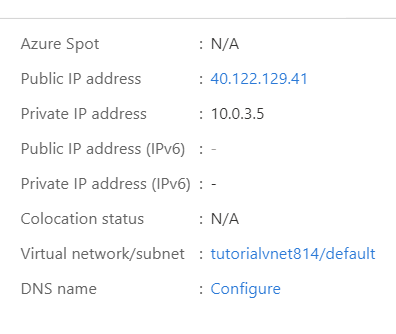
In our case, the IP address is 40.122.129.41.
We also know that our open RDP port is 3389 from when we set up the VM. Thus we open the Remote Desktop Connection App and enter 40.122.129.41:3389 into the Computer text box and our username that we created into the User name text box (in this particular VM the admin username was jacob).
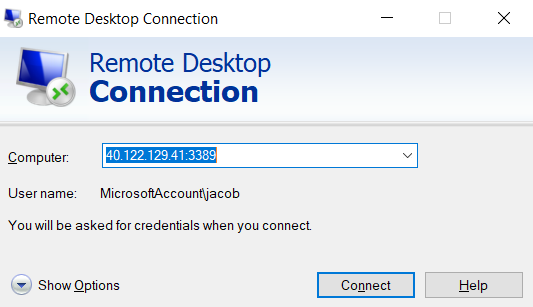
From there we will be prompted with the password for our user, and if it is entered correctly, we will have a new window pop up that will be the VM.
Mount a File Share on the Windows VM
To do this, follow the Create a Storage Account guide. If you already have a Storage Account, you can just skip to the After Creation portion of the guide.