Run Mircosoft Azure’s AutoML on MNIST
This guide will go over how to create a Machine Learning resource on Azure and how to use that resource to run Microsoft Azure’s AutoML service on the MNIST Dataset. The MNIST dataset has thousands of handwritten numbers 0 through 9. Our goal is to use AutoML to train a machine learning model that classifies which digit the image is for this dataset.
Create a Machine Learning Resource
First, log into https://portal.azure.com/ using your Illinois credentials. You should see a similiar to the picture below.
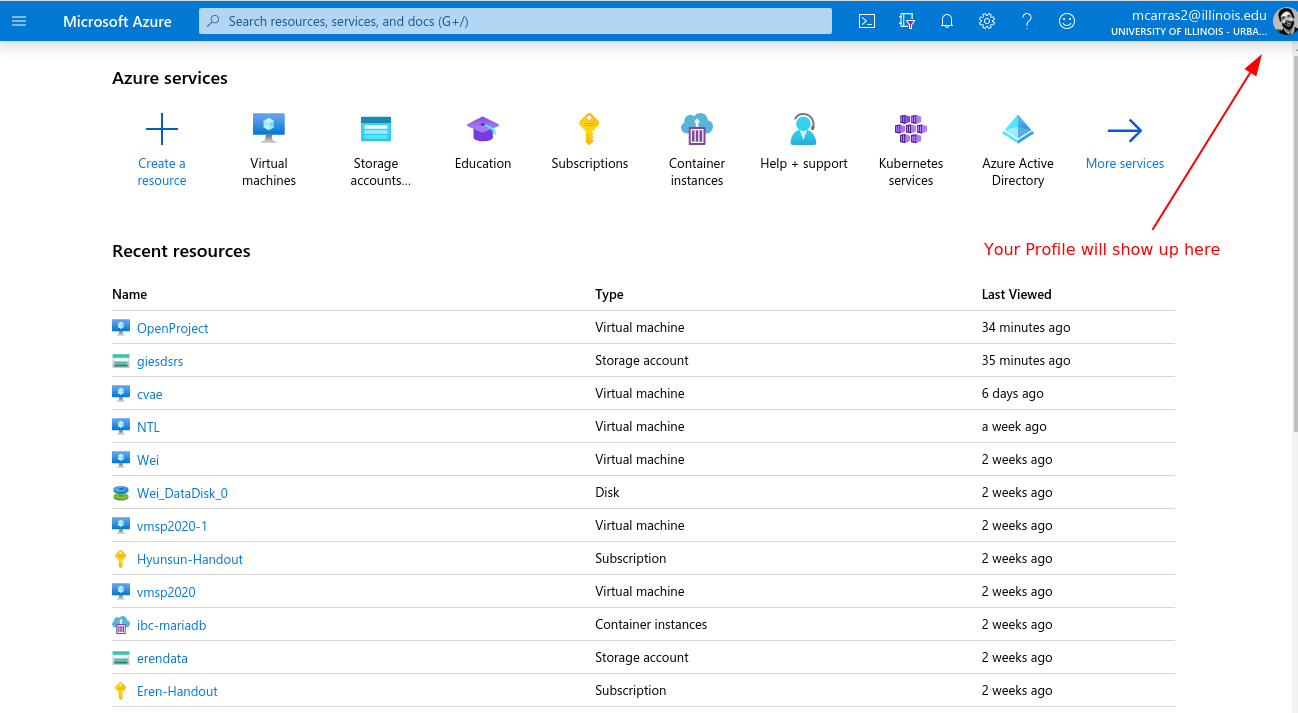
After you have logged in, click the Machine Learning button if you see it or type it in the search bar. Once you are at the Machine learning page, you should see all of your current Machine Learning resources. We want to create a new one, so click the Add button in the top left of the screen.

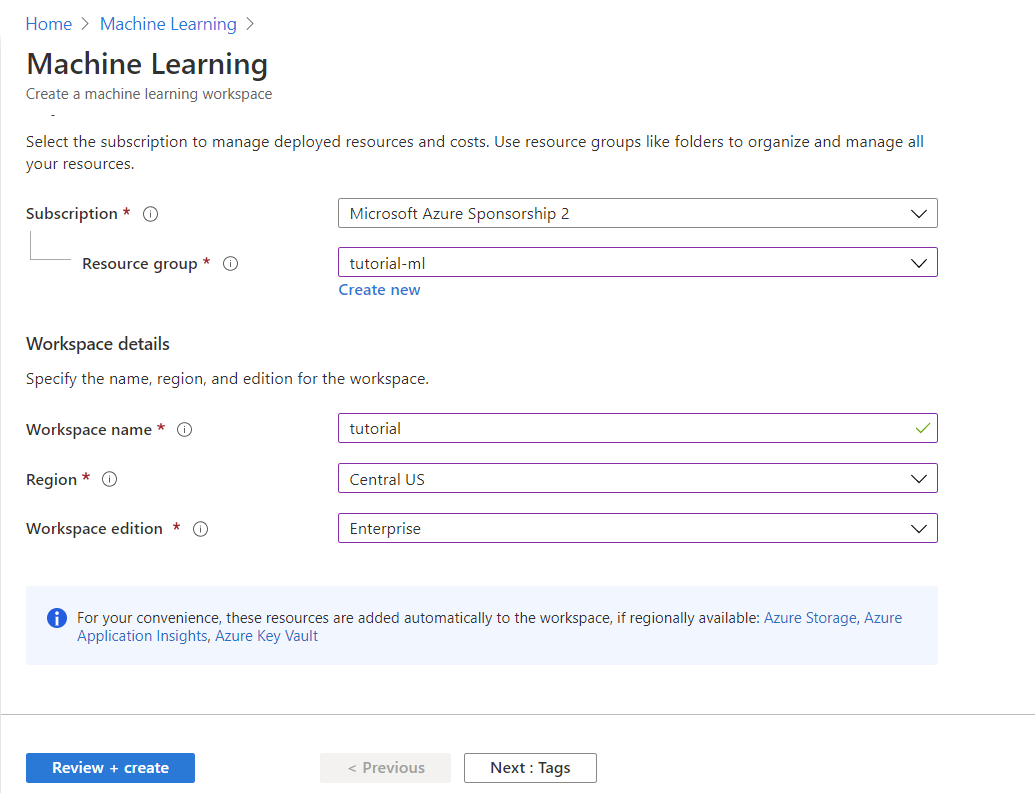
Basics
- Make sure your Subscription is the right one.
- If you don’t have a Resource group just create a new one
- Give the Machine Learning resource a name, e.g. tutorial
- Select your Region (make sure is within the US).
- Choose the Enterprise edition of the Workspace edition. Basic does not allow use of AutoML
Tags
Optional. Used so you can easily spot your resource among others, to separate the entries in billing, etc.
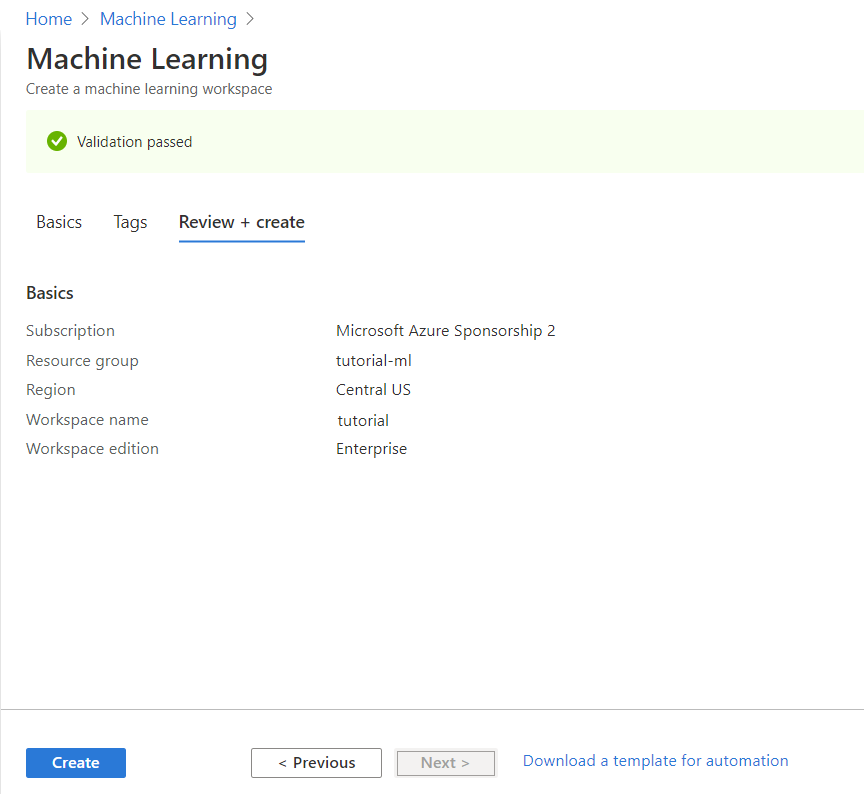
Review + Create
At the top there should be a green check mark saying Validation Passed, if not, then restart this guide. This page lets you review the choices you made during creation. If you are satisfied with your choices and validation has been passed, click Create. It will take a few minutes until the resource is up and running.
Create Compute Cluster for AutoML Run
Now, go to https://ml.azure.com/. Here is where you can use your machine learning resource. If you have more than one Machine Learning resource, click the Change Subscription button in the top right of the webpage and change the Current Workspace to the resource you just created.
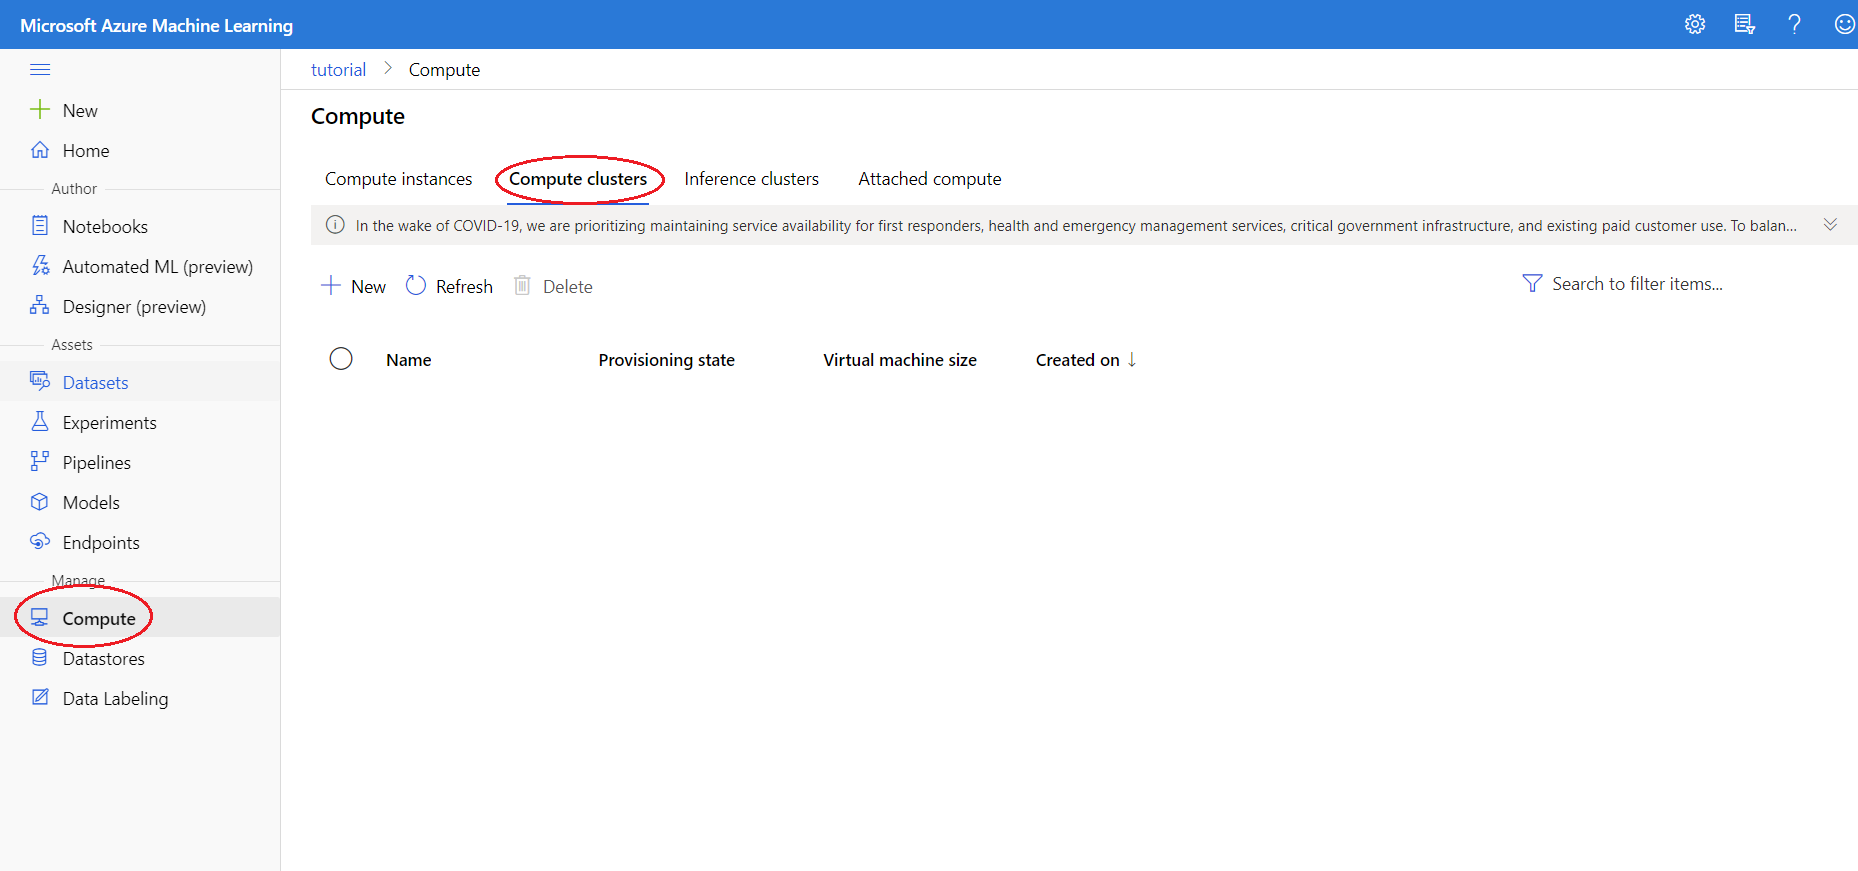
Since we want to use an AutoML run, we need to create the compute cluster it will run on. Click the Compute tab on the left-hand side and go to the Compute Clusters tab on the top.
Now we will create a new compute cluster.
Create New Compute Cluster
- Create a name for your compute cluster
- Dedicated Virtual machine priority is fine
- Select the size of your nodes.
- Keep the minimum number of nodes 0 so you do not get charged while not using the cluster
- Select the max number of nodes you want.
- Default Idle down time is fine unless you have a specific reason to change
- Default Advanced Settings are fine as well unless you have a specific reason to change them.
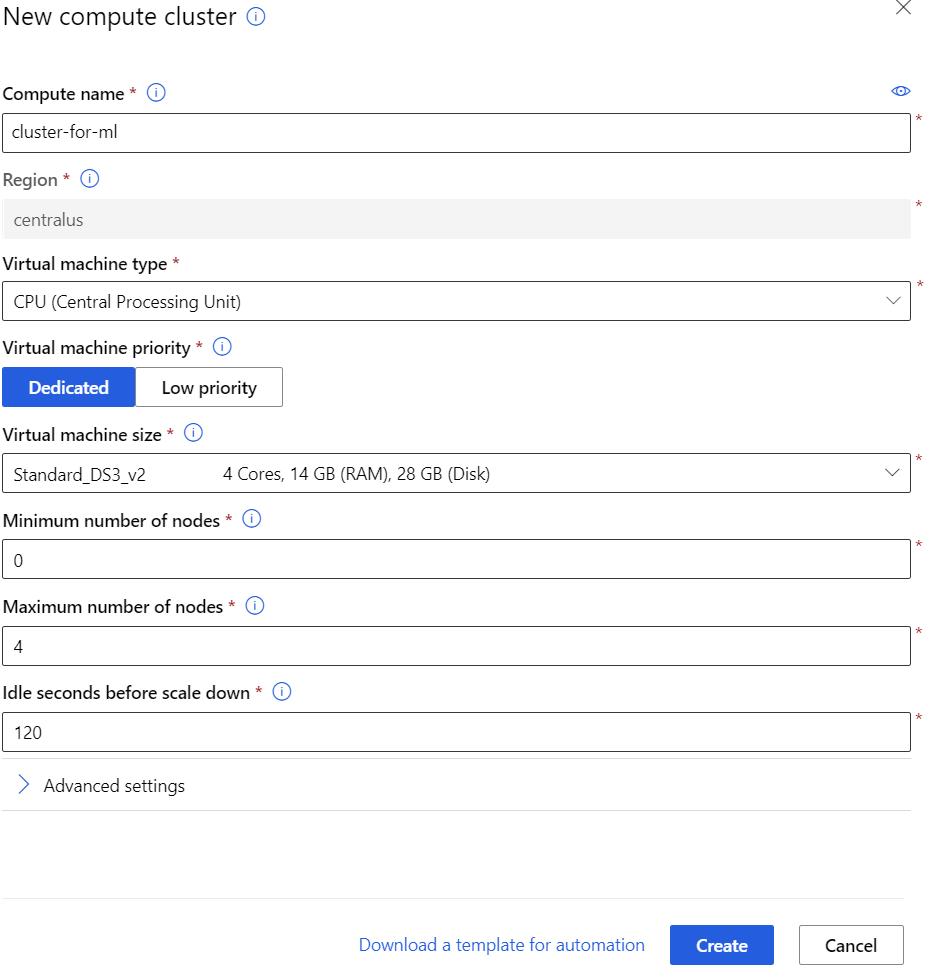
After you are done with filling in the boxes with your desired specifications, click Create. It will take a few minutes for it to be ready.
Import Dataset into Machine Learning
Now, we will import our desired dataset into Azure. For this tutorial, we will use the MNIST dataset, which is already saved on Azure. Go to the Datasets tab on the left and then go to the Create Dataset button near the top of the page.

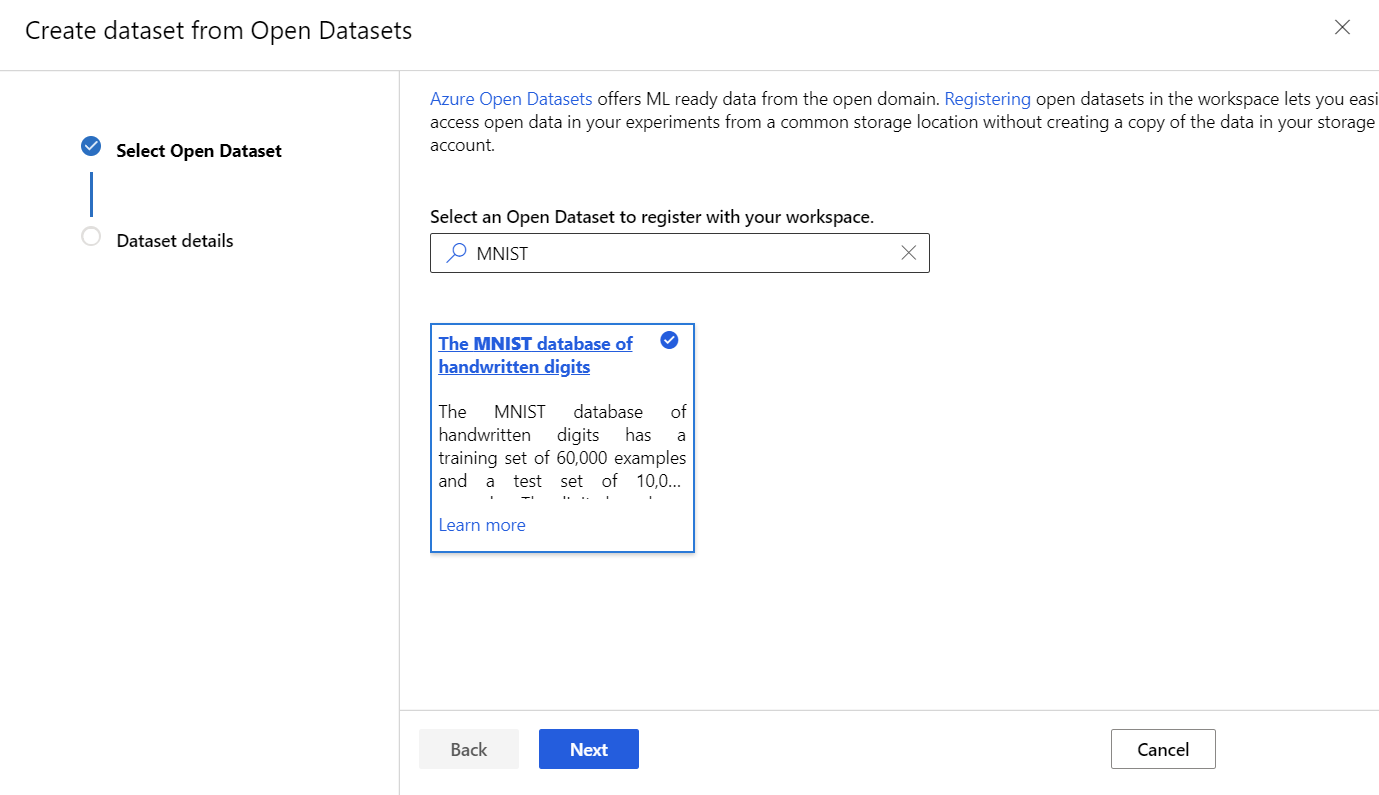
Now import your dataset from the place you have it stored. For this tutorial, the MNIST dataset can be found by clicking the From Open Datasets, and searching for MNIST.
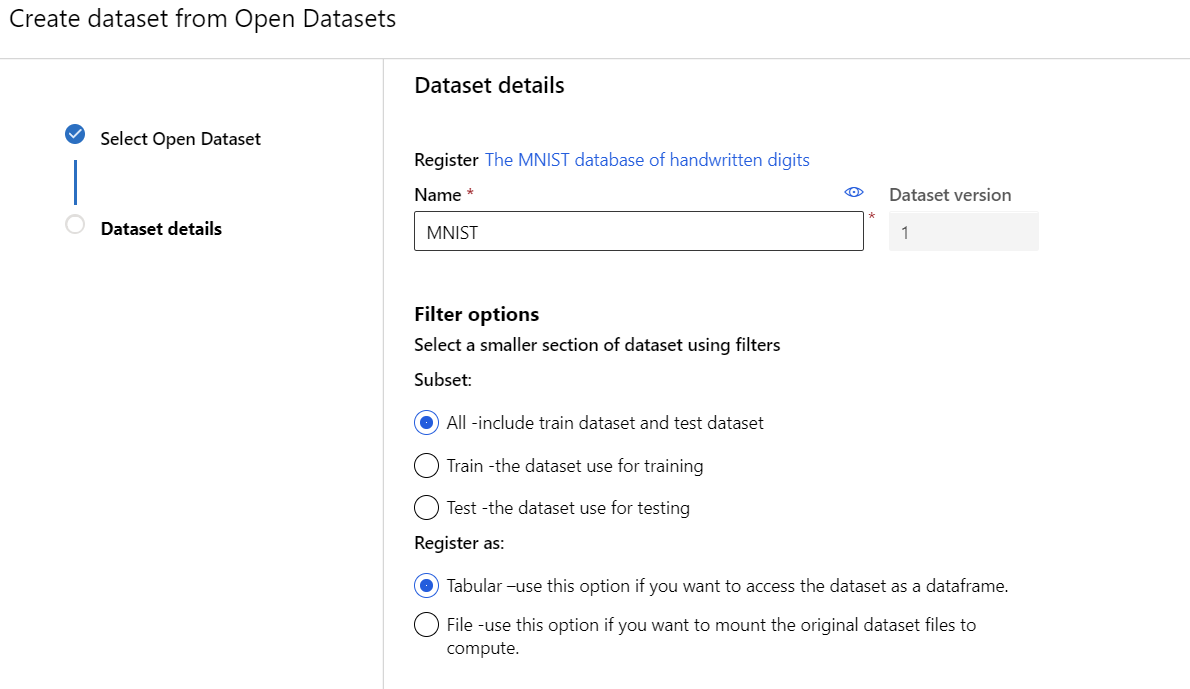
After clicking Next, you will need to:
- Name your dataset e.g. MNIST
- Select which Filter Options fits your data
- Select whether you want your data as tabular or as a file.
After you are done with picking your dataset and its options, click the Create button and the dataset will show up in your Datasets tab. It might take a few minutes.
Create an AutoML Run
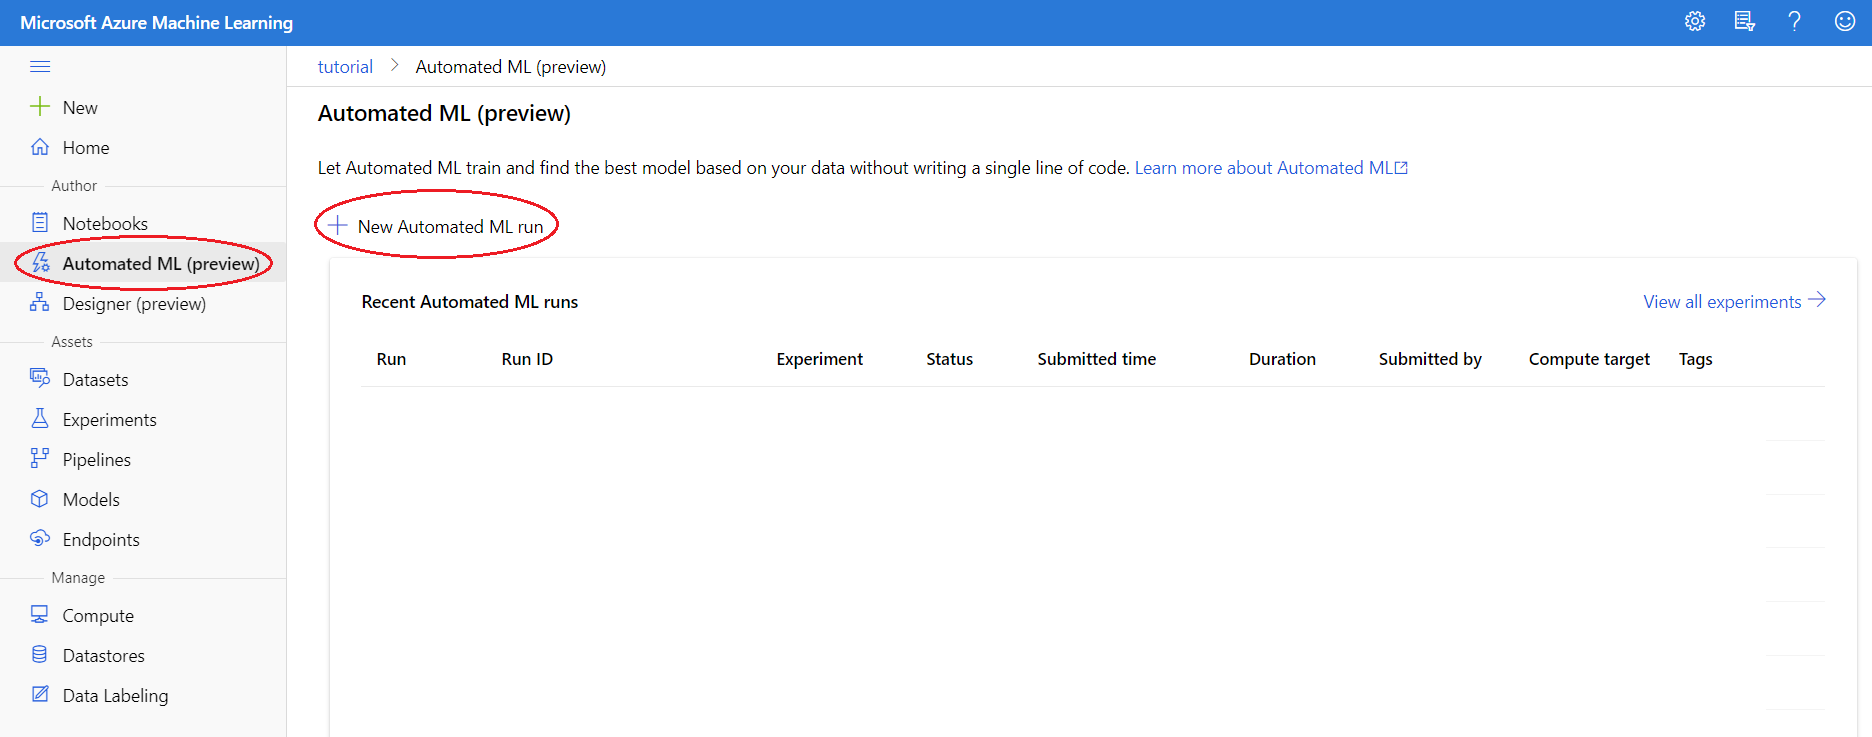
We are now ready to create an AutoML run. Go to the Automated ML tab on the left and click the New Automated ML Run button near the top.
Create the AutoML Run
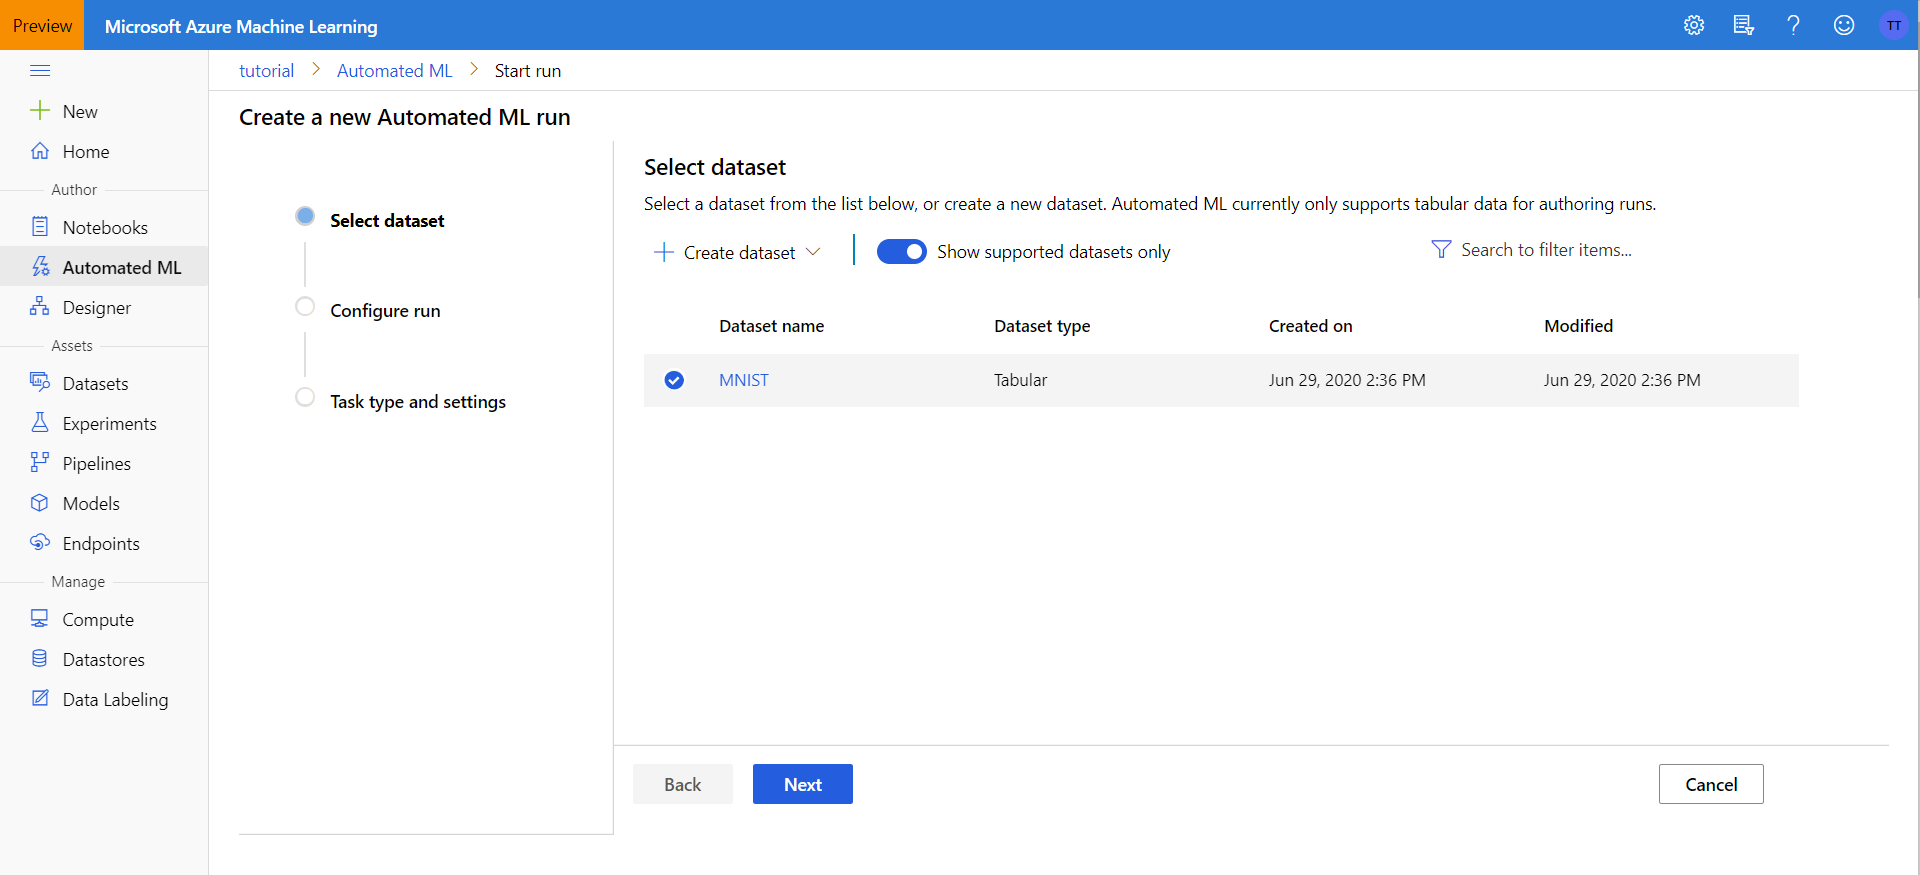
Select Dataset
First, select the dataset you want, in our case it is MNIST, since that is what we named our dataset in the previous part.
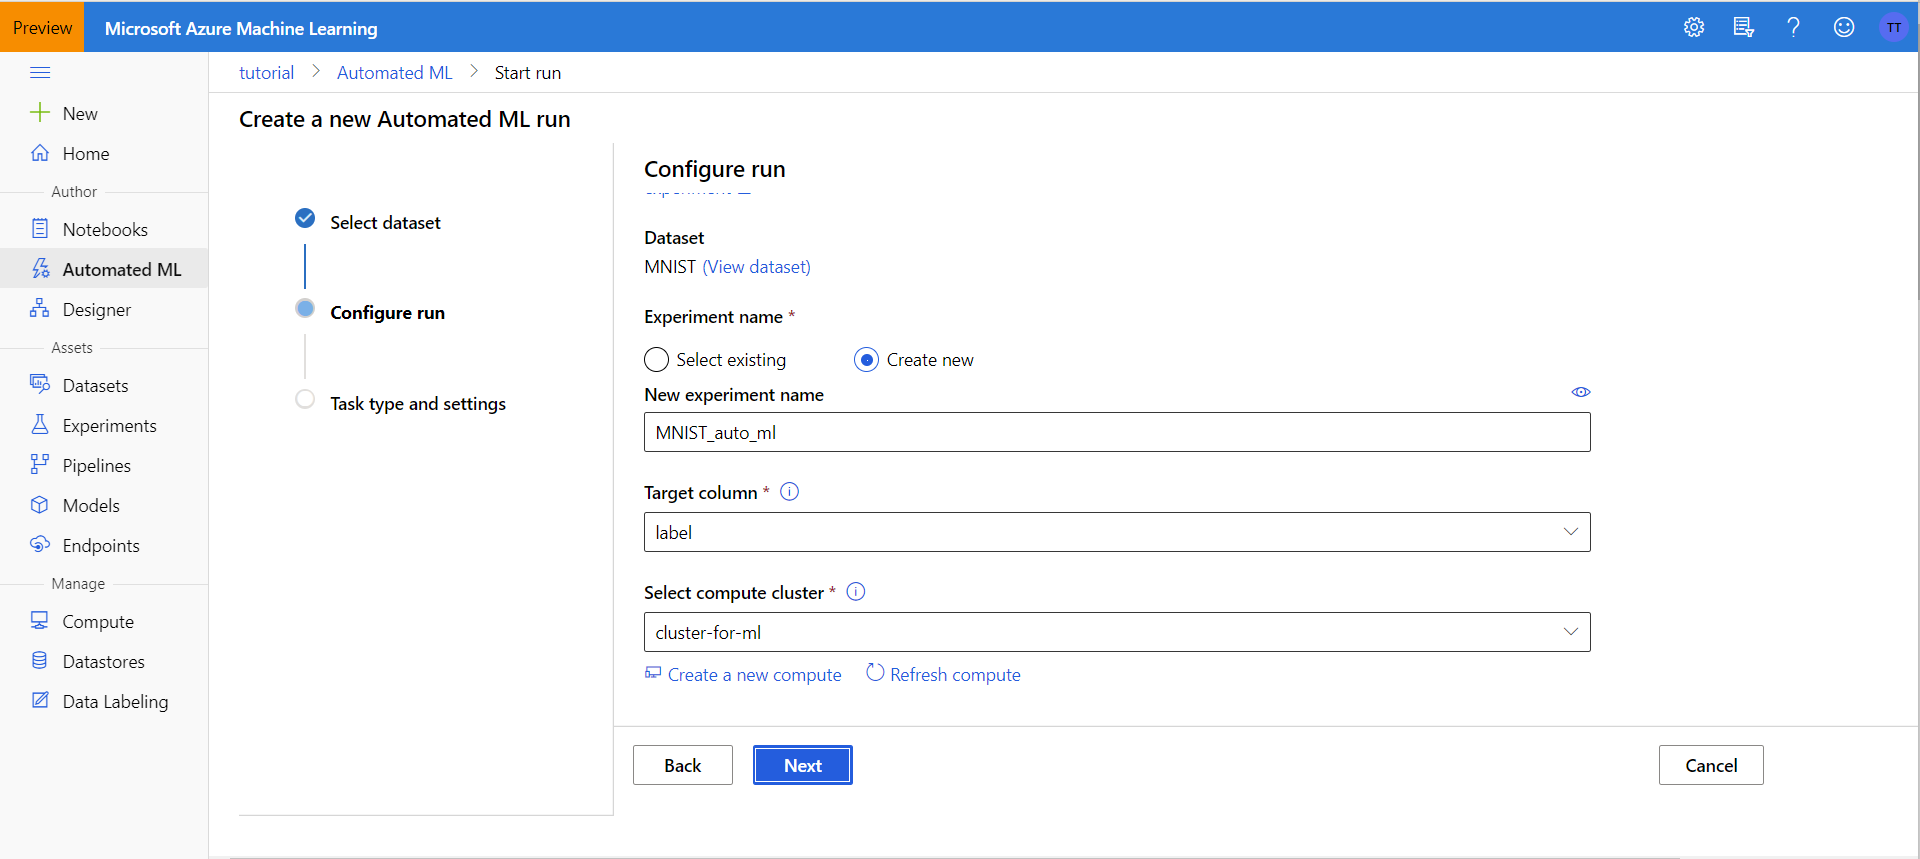
Configure Run
Now we will create a new experiment and call it MNIST_auto_ml. Our target column is label (what number 0-9 the picture is of) and our compute cluster is the one we just created above.
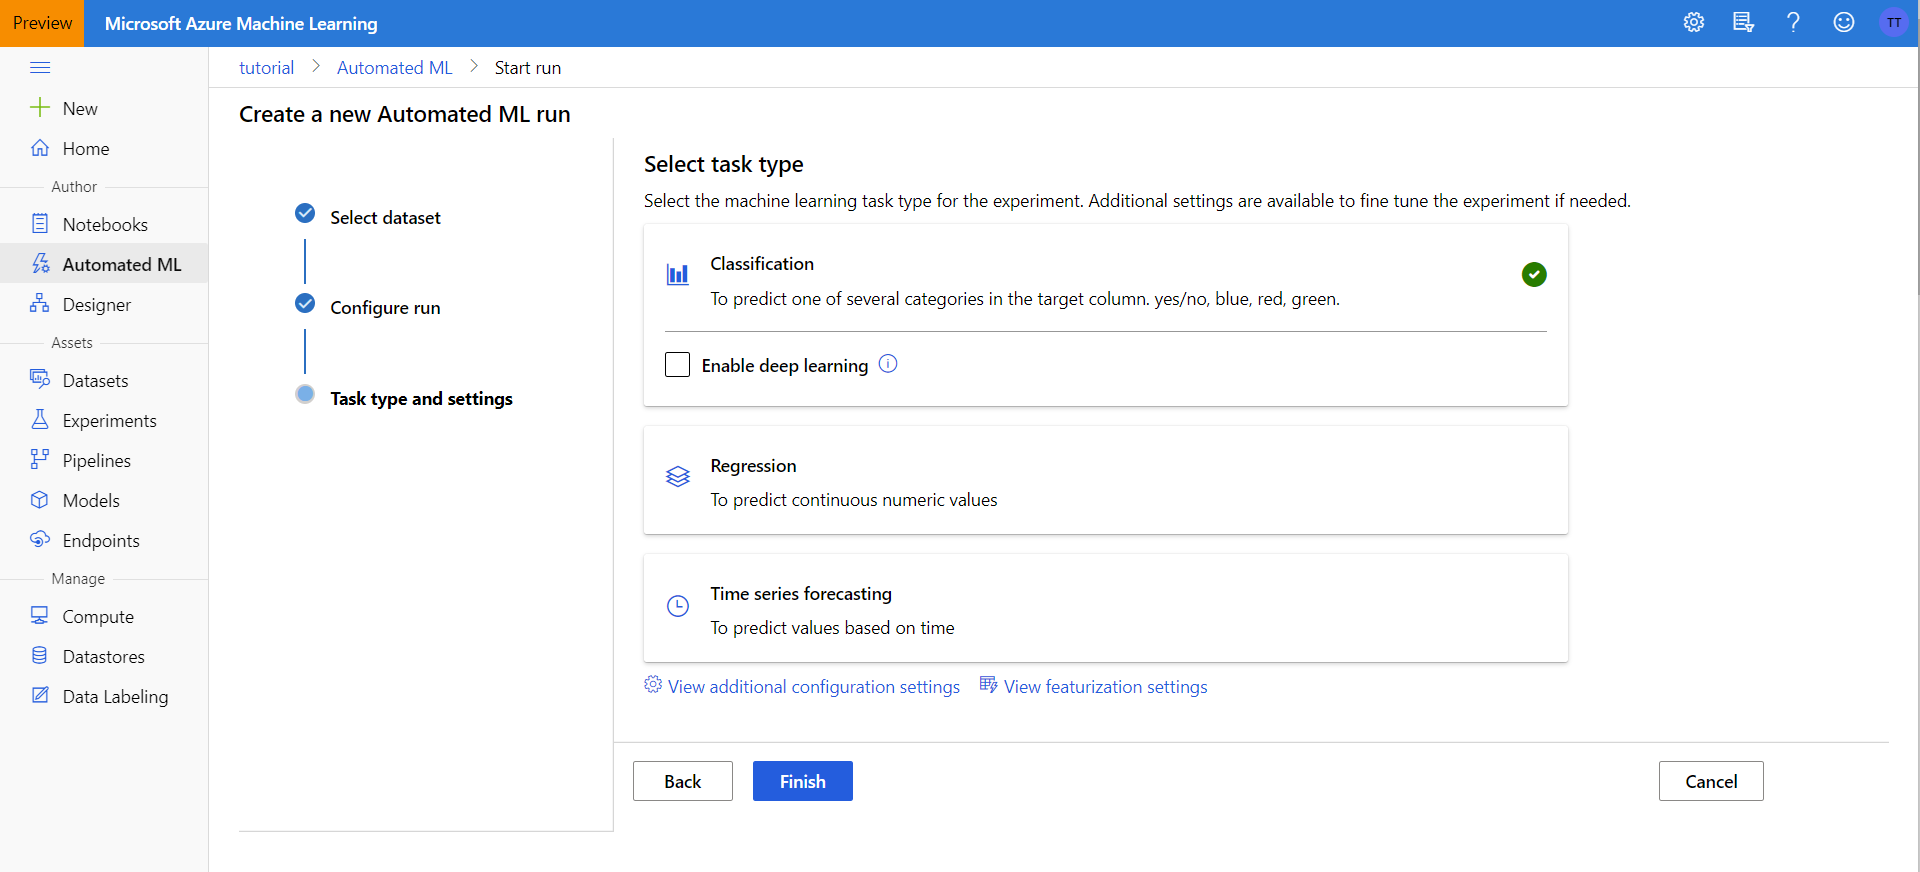
Task Type and Settings
We are trying to make a classifier, so we will keep Classification clicked. We will not enable deep learning in this tutorial, however you can if you want.
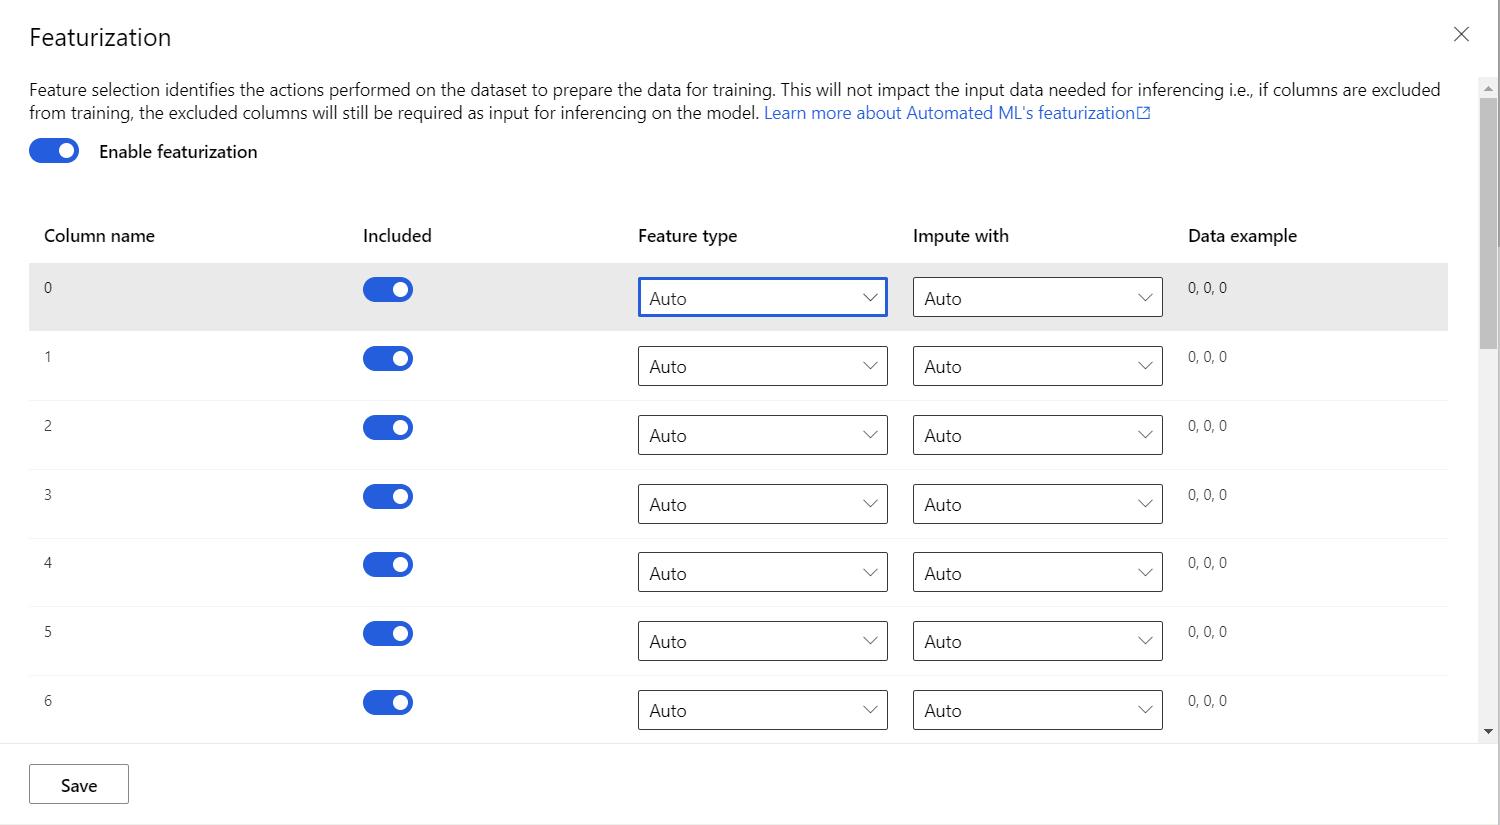
View featurization settings
The View featurization settings allows you to select which columns the learner will use as well as how to impute NULL values in the data. It also allows you to specifically state what feature type each column is.
View additional configuration settings
- The primary metric is the metric each model will try to optimize
- You can choose to not run specific algorithms
- Exit Criterion
- The timeout time for the AutoML run can be changed
- A threshold can be put on each model
- Validation
- You can select which validation type you want your model to go through.
- Concurrency
- This number is how many models can be training at one time. The default is works well.

After you are done with changes these settings, click Finish and your AutoML run will start. Depending on your data size it could takes minutes to hours if not longer to fully run.
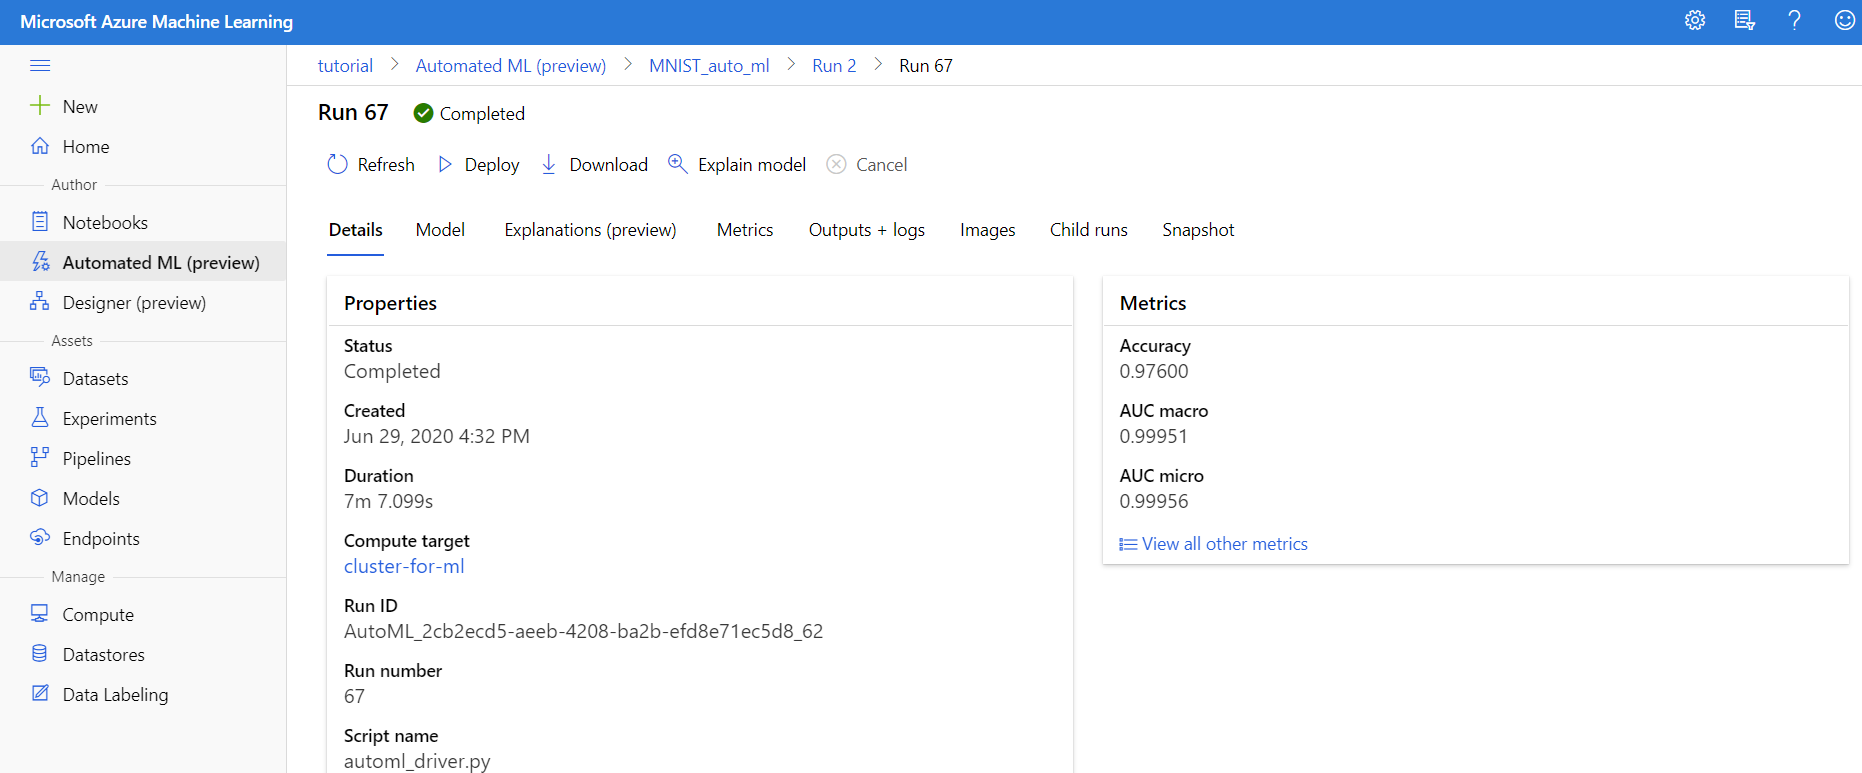
Finding the Best Model
After your AutoML run has completed, if you haven’t left the page or go the Automated ML tab and click on the run, you should see something similiar to the picture below:
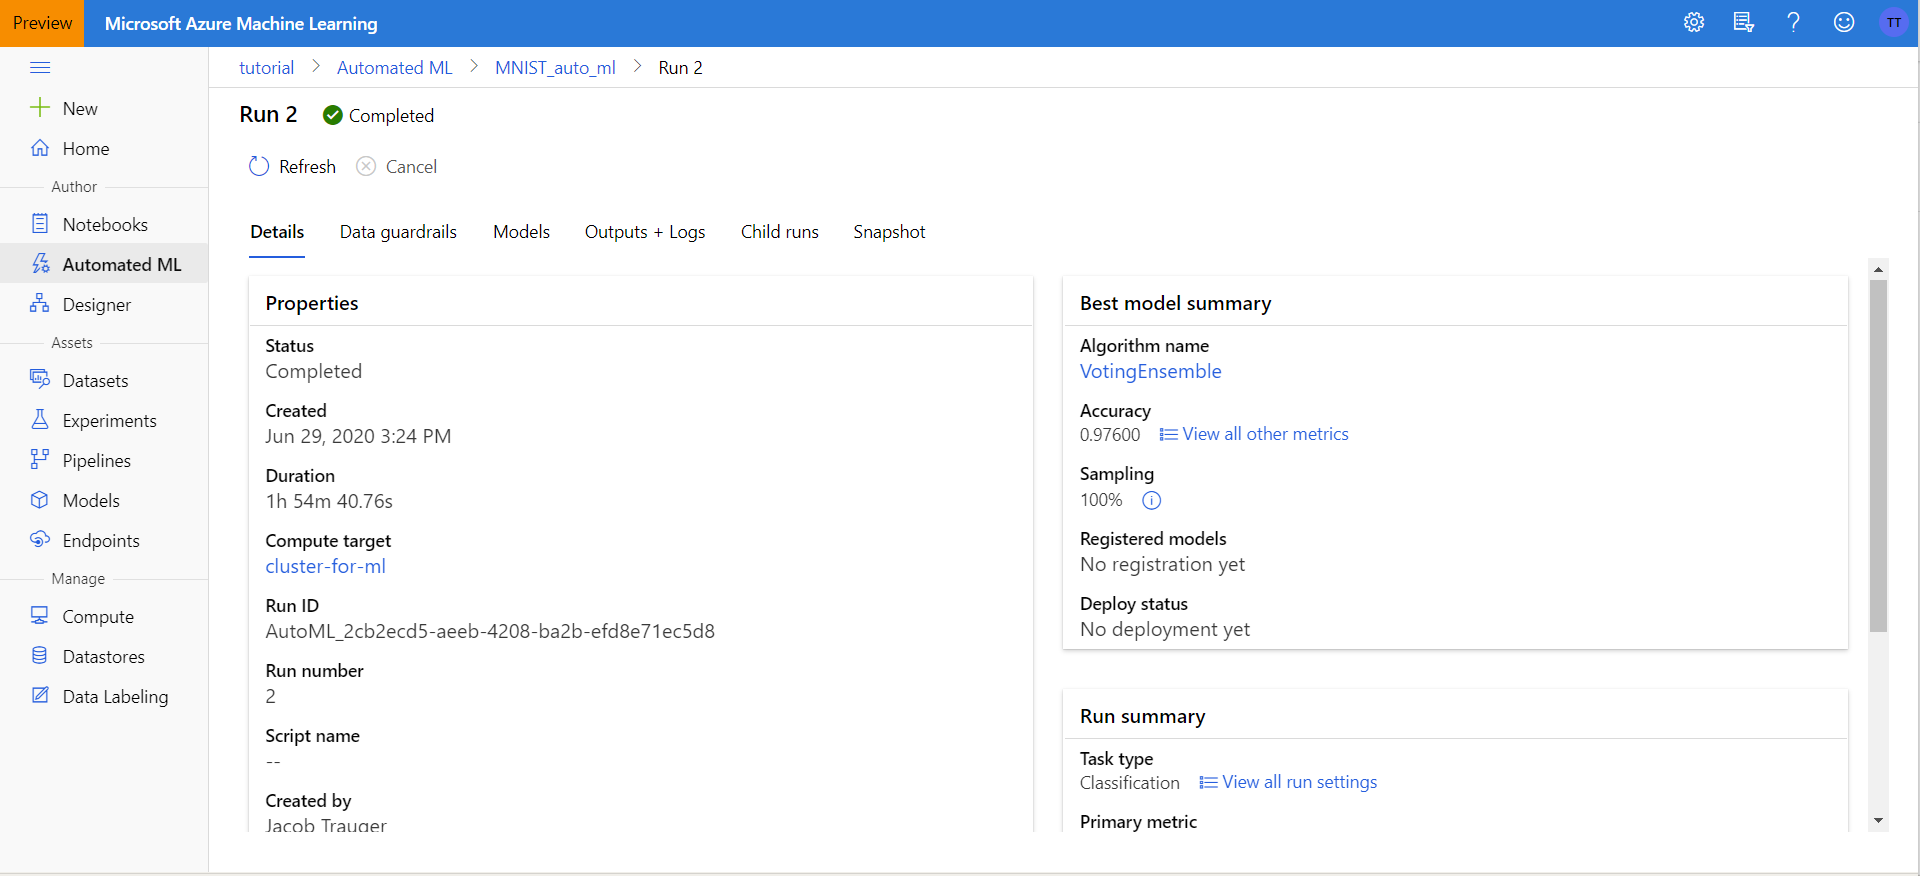
If you click on the Models tab at the top you can see all of the models that were trained. As we can see, on this run the best model found was a VotingEnsemble with 97.6% accuracy.
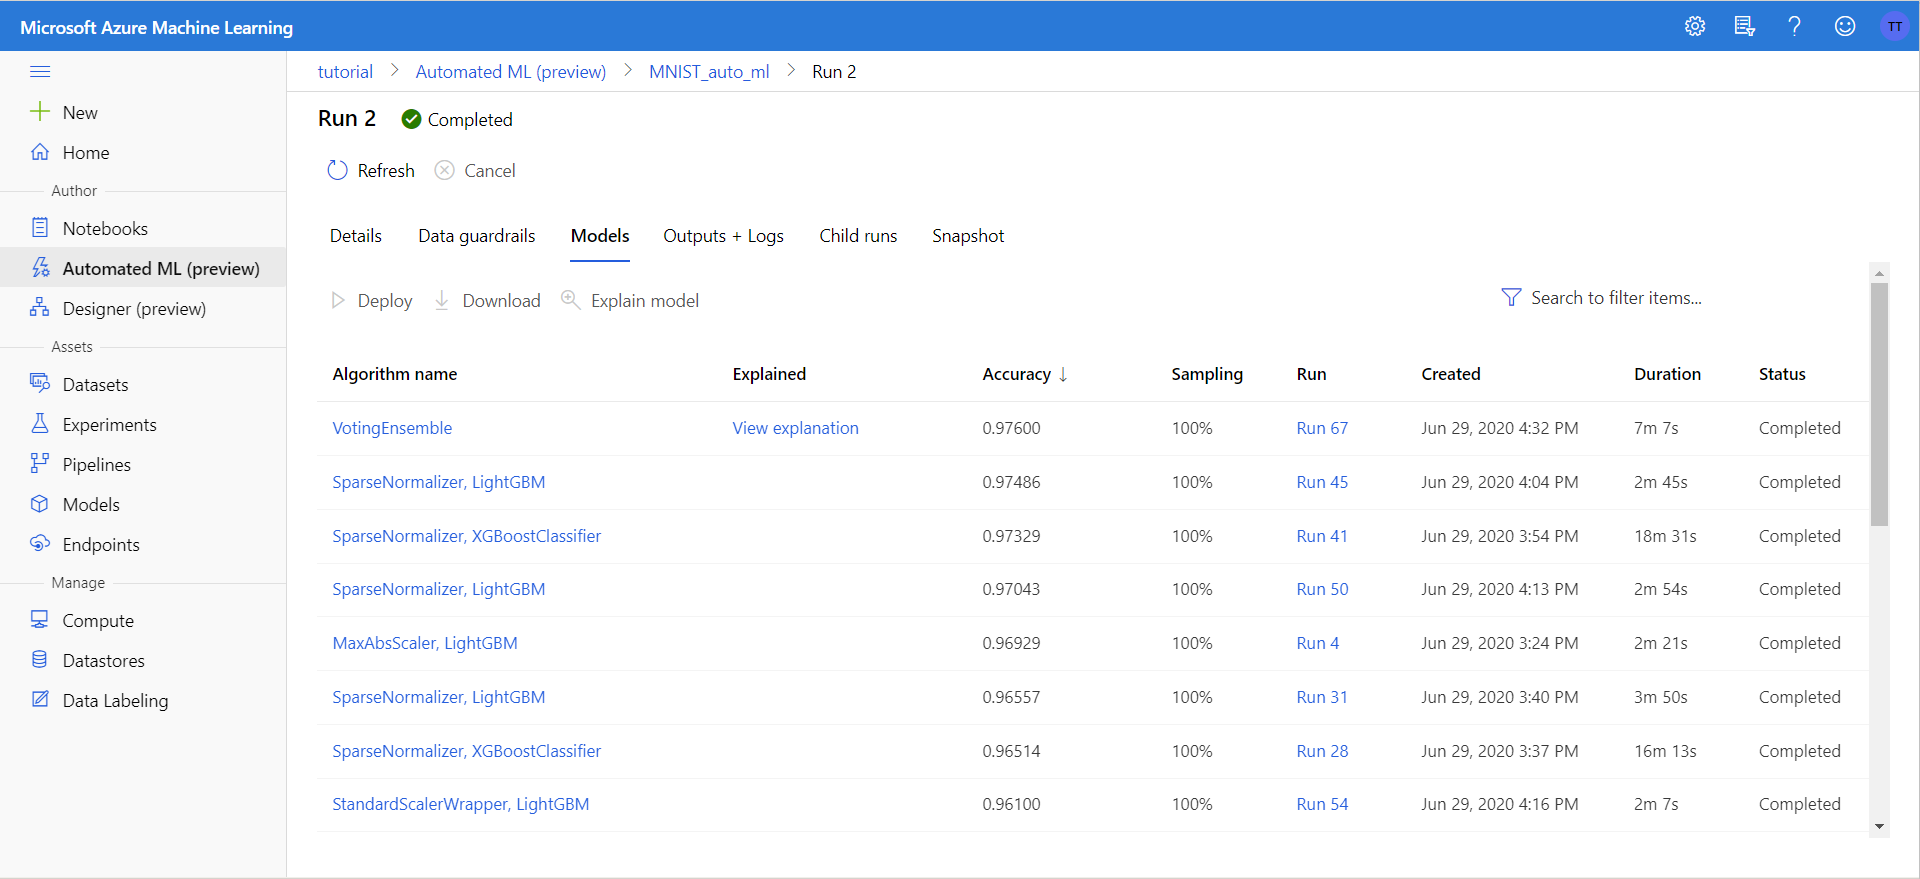
Clicking on the model will bring us to a new page about the specific trained model. From here you can find out more about the specific model by clicking through the various tabs as well as deploy or download the model.